A Wicked Scoff...Recipes and Food with Newfoundland and New England Influences.

This blog is dedicated to bring recipes, photographs, anecdotes, reviews and other insights on everything food related. As the name suggests, "A Wicked Scoff" will have a regional flare, a fusion if you will, of both Newfoundland and New England perspectives of the culinary world around me. Thanks for visiting and please come back often as updates will be frequent. Oh yeah, I also like tasting and cooking with regional beers. Expect a beer of the month, often paired with recipes.

Thursday, July 28, 2011

Summer of Savory


Of all the ingredients associated with Newfoundland cuisine, I do not know if there is one more synonymous than dried savory. While items such fat back, molasses, salt cod, and Purity syrup are very much a part of our culinary history, summer savory, especially that made by Mt. Scio Farms in St. John's is as Newfoundland as it gets. Just as you are are certain to find an empty Maple Leaf vienna sausage can at the outlet of every brook at every pond in Newfoundland, you're even more likely to find a package of dried savory in every kitchen cupboard in the province.

Newfoundlander's love their savory. We really love it in out "dressing" ( aka stuffing) used for stuffing turkeys and chickens for roasting. Unlike some complicated turkey stuffing recipes, Newfoundland savory dressing is quite simple to make really, combining fresh bread crumbs (homemade white bread is best) with minced onion, some melted butter (usually margarine actually) dried savory and possibly a little salt and pepper. Almost as popular as savory in fact is savory dressing you;ll find elsewhere besides in a roasted bird however. A signature Newfoundland dish is the ever-popular fries (or chips), dressing and gravy, which can be found at most any restaurant and take-out, stadium or chip truck. The dish, when prepared right consists of a pile of golden homemade french fries (double-fried), combined with fluffy savory dressing and smothered with a rich home-style chicken gravy (darkened with gravy browning of course. None of this white chicken gravy stuff...that would be gross). French Canadians have their poutine, other places have chili cheese fries, but our carb-laden, heart-attack on a plate is the most satisfying and tastiest in my opinion.

Besides being used in dressing, savory is also commonly used with fish and other meats. It goes great in cod au gratin and with fried or braised pork chops. For me though, the uses and application of savory are unlimited. While I enjoy my supply of dried Newfoundland savory very much, I decided this spring to try growing my own savory. Dried herbs are good and have their place in cooking, but there's really no substitute for the flavor achieved from using fresh herbs. Not being able to find savory seeds at some local stores here in western New England, I opted for the Internet and was quickly able to find organic summer savory seeds online. What is "summer" savory you ask? Well there are two varieties of savory, summer and winter. Winter savory is a perennial herb (meaning it grows back every year in our climate....and year round in warmer
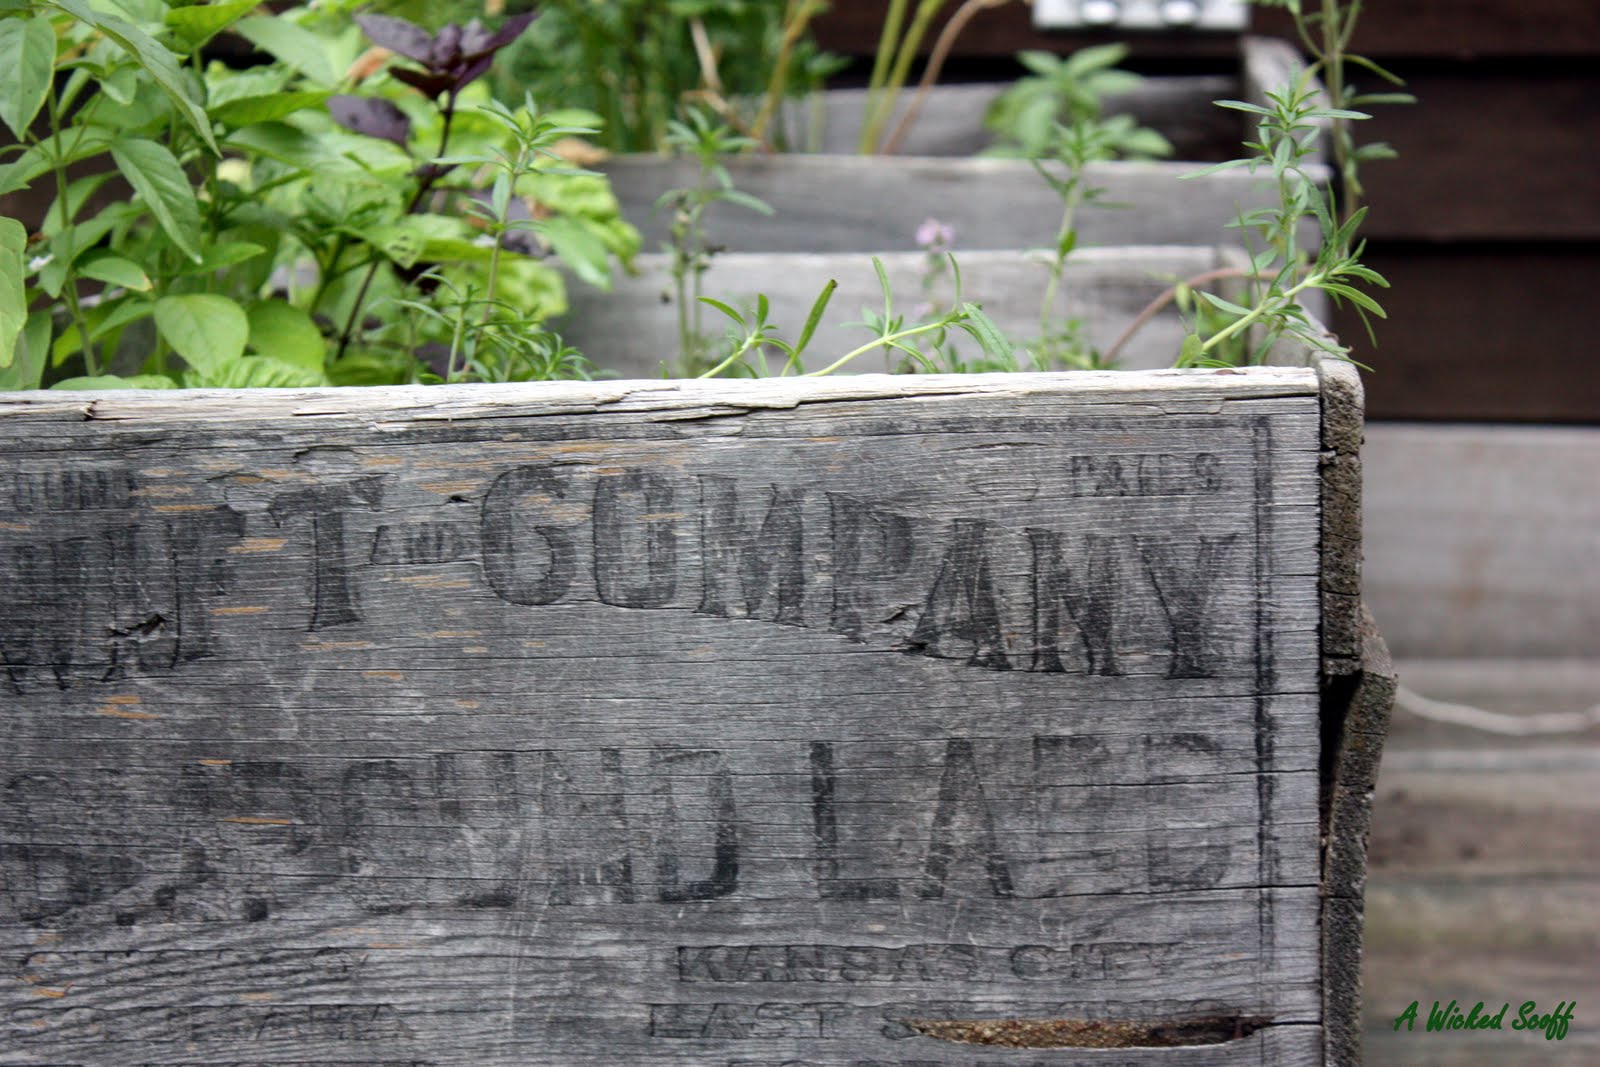
Summer Savory Growing in a Small Herb Planter Box
 regions) while summer savory is an "annual", meaning it has to be replanted by seed every year. Winter savory is a little woodier plant that summer savory and the leaves have a stronger, more robust flavor than its cousin. Summer savory, which is the kind I grew up eating in Newfoundland, has a pungent, sweet and peppery flavor, similar but still  distinct from thyme and sage. Traditionally, summer savory is a popular herb used with wild game and waterfowl, sausages, stews, beans, and potatoes. It's quite common in some regions in eastern Europe, but why it became so popular in Newfoundland is something I still do not know. Whatever the reason, I'm glad it ended up on our shores!

Savory Fries with Grana Padano and Truffle Oil
So, with all the beautiful summer savory I have growing in my garden, I wanted to make a simple bistro style dish using a few simple, but very tasty ingredients. Many people know that once of the best and satisfying concoctions is the pairing of hand cut french fries tossed with fresh rosemary and salt. Some places take this even farther and grate some pungent Parmesan cheese with the mixture for a truly delectable experience. Not to be outdone, I decided to take this to the next level and make my own version. What I did was cook some of wicked simple oven roasted fries. While they were still piping hot I tossed them with sea salt, a tablespoon of fresh minced savory, and a little grated Grana Padano cheese (a hard, aged Italian cheese). After plating the salty, herby fries, I drizzled just a little of my truffle infused olive oil around the plate. The result was literally heaven on a plate as the aroma of the earthy truffles with the herbs as they reacted with the heat of the crispy fries, paired with the sea salt and cheese, was a flavor explosion in my mouth. The freshness of the savory really let the defining characteristics of the herb shine through, an affect that could not be duplicated with dried herbs. The dish did in fact remind me of fries, dressing and gravy, without the bread stuffing or the gravy, and hence without a lot of extra calories and fat. I encourage you to try growing your own savory and when you do, try this upscale spin on a Newfoundland classic.

Tuesday, July 19, 2011

Cibatta Chicken BLTA Sandwich


 One of the things I love most about food and cooking is the ability to make something truly satisfying and delicious out of a few simple ingredients and even simpler techniques. One way for any cook to do this, no matter their level of skill is to put together a really great sandwich. Using great bread, well cooked and seasoned meat, crisp vegetables, flavorful cheese and a variety of condiments will always taste better when you make it yourself as opposed to eating anything from a fast food joint.

I'm a real sucker for bread, and when I see really nice artisan or homemade bread I can not resit buying some and digging in. Last week my bread victim were some nice large Cibatta rolls. Having grilled some bone-in, skin on chicken breasts the night before (marinated in fresh garlic, herbs, lemon and olive oil), I knew I had a winner sandwich in the making. I also have some excellent thick-cut, double smoked bacon on hand, fresh herbs in the garden, sharp Vermont cheddar, a ripe avocado and some other goodies. Here's how I put it together.

Ciabatta Chicken BLTA Sandwiches with Herb Mayo


The first step is to get all of your ingredients out on the counter and organized. In a skillet or in the oven, cook 3 slices of bacon (cut in half for 6 half slices) until crisp. meanwhile, remove the chicken meat from the bone and cut into half inch thick slices against the grain, then half length-ways so you are left with large chunks. Next prepare the herb mayo. For two sandwiches I used 2 heaping tablespoons of Hellman's and mixed in some finely chopped basil, parsley, thyme and oregano, plus a tiny pinch of kosher salt and a few cracks of black pepper. Stir well and add to the chicken, again combine well. That's your simple chicken salad for the sandwich.

Turn on the oven to about 350. Slice the cibatta rolls in half and lay cut side down in the oven to toast. Now start prepping the other ingredients by slicing tomatoes, chopping lettuce, slicing an avocado, and sharp cheddar cheese. Remove the tops of two rolls from the oven and add the cheese and top with the bacon. Return the tops to the oven to melt the cheese.While the cheese melts build the sandwich from the bottom up with avocado slices, lettuce, tomato slices (the LTA of the BLTA.....bacon is the B) and chicken salad. I also like to add banana pepper rings for a touch of heat and acidic contrast from the pickling. Remove the sandwich tops with their gooey bacony cheese topping and place on top of the rest of the sandwich. Slice in half and you're ready to dig in. Serve with some large kosher dill pickles and potato chips and you''' be all set!

Saturday, July 16, 2011

Moose and Partridgeberry Panini

Here at A Wicked Scoff I'm always thinking about how I can take traditional Newfoundland or New England ingredients and use them in a new and unique way. Living here in the Boston States I do not have a full arsenal of Newfoundland fare at my disposal but I do have special products that let me get my creative culinary juices flowing.

Down to my last couple pint sized Mason jars of my Uncle's bottled moose (from central Newfoundland), I decided to try something special. I wanted to build off my last bottled moose creation, the moosewich dip, and go more outside the box. I know that red meat, and especially game go great with tart berries, wine and port so I utilized a couple other Newfoundland ingredients and came up with a tasty moose panini sandwich.I paired the tender morsels of moose with some tart partridgeberry jam (aka lingonberries in other parts of the world, notably in Scandinavia or at IKEA stores) and sharp aged cheddar cheese. I made these grilled sandwiches on some wonderful, locally made rustic sourdough bread, for even extra tang and a great chew. Any kind of good quality bread would be great though. Not wanting to throw away and waste all the moose bottling liquid (referred to as moose liquor from this point forward), I paired it with some Newman's Port. I drizzled the port moose liquor reduction around the plated panini and dipped some of the bites into it for an extra fruity, salty burst of flavor. Here are some pictures and how I put it all together.

Moose and Partridgeberry Panini with Port Reduction (2 large sandwiches)


Ingredients:

  • 1 pint of bottled moose (can use slow cooked braised game or red meat)
  • 4 large slices of quality bread such as sourdough, 
  • sharp cheddar cheese, sliced (brie cheese would also be nice I imagine)
  • 2 Tbsp partridgeberry jam/preserves (or lingdonberry, may substitute with red current jelly, etc)
  • 1/4 cup of port
  • non stick cooking spray
Directions:

First off, I you do not have a panini press, don't sweat it. These sandwiches can be made in a skillet just as you would a grilled cheese or even on a cast iron griddle. If you want the panini effect of the sandwich getting pressed add a heavy pan to the top of the sandwich to press it a bit.

To start, place the contents of your bottled moose in a small skillet (I use a skillet as opposed to a sauce pan as this will help with the reduction later). Heat the moose and liquor through over a medium heat. I like to have the moose warm on the sandwich instead of putting it on there cold. Next, plug in your panini press and let it get hot. Lay out your four slices of bread and begin to assemble the sandwiches. Spread 1 Tbsp of the jam on two slices and cover the other two slices with thinly sliced sharp cheddar cheese.Next divide the tender moose meat atop the slices with the cheese. There should be enough moose to sneak a couple pieces into your mouth as a little snack. Lay the jammed slice of bread onto the moose/cheese slice and you're all set. Open your panini press and spray both sides with nonstick spray or oil. Lay on the sandwiches and press down. Cook according to your machines directions or until browned, crispy and heated through.

I let the paninis rest for a couple of minutes (they're too hot too eat) while I make the reduction. Bring the reserved moose liquor to a boil and add a 1/4 cup of port. Stir together and let reduce until it becomes syrupy and coats a spoon. Use this reduction to drizzle around your plated panini for dipping. This sandwich was a huge hit at home the other night and I'm sure it will be for you and your friends and family too. Paired with a nice glass of Rodrigues wine or cold glass of beer and you'll have a great combination. So here you have it, two of Newfoundland's best ingredients, moose and partridgeberries together again, just as they are in nature out on the barrens.

Tuesday, July 12, 2011

Wicked Summer Eats....in Newfoundland

For all you A Wicked Scoff readers and Facebook Fans, be sure to pick up the July issue of Downhome Magazine to read my article on wicked summer eats in Newfoundland. If you live in Newfoundland, will find yourself vacationing there this summer, or have an intrinsic interest in "The Rock", I think you'll enjoy my top 10 list of places I plan on eating at this summer. While my list is capped, there are many more establishments around the Island that I hope to check out. Be sure to send me your selections of restaurants, take-outs and the like that I just have to go check out. Whether its your favorite fish and chips spot, best home-style cooking restaurant that will make me think I'm back in Nan's kitchen or the best ice cream stand, I want to know about it. Drop me a line here on the blog, on A Wicked Scoff's Facebook Fan Page or by email at awickedscoff@gmail.com.

I look forward to hearing from you. In the meantime, here are a couple of my "wicked summer eats" picks. For the rest make sure to pick up your copy of Downhome Magazine. And remember, if you haven't hit like on the Facebook page, and you do like A Wicked Scoff, be sure ti visit. Right now we're at 282 fans, lets see if we can hit 300 this week!

Sample of Wicked Summer Eats (Downhome Magazine July 2011)

The Rooms Café – I’ll likely drive back into St. John’s the day before I fly out so I can spend more time with old friends. Resuming a tradition I started on my last trip home, I’ll fuel my appetite with a brisk early morning hike out through the battery and up and down Signal Hill. That hike has to be one of the best gems of any city in North America and I am going to take full advantage. From there I’m driving straight to The Rooms, where from the café there you’ll be treated with a view out the narrows and down over the jelly bean coloured houses and other unique architecture that give St. John’s its character. While I know the view from The Rooms is spectacular, I’ve never eaten at the café, but from the look of their menu I might be hard pressed to go just once. I’m thinking a hearty traditional Newfoundland breakfast of toutons, baked beans, and local apple sausages with some Jumping Bean coffee will be just what the doctor order for this soul. I’m pretty sure if I was still living in the “sin city” that The Rooms Café would be a weekly ritual.

The Duke of Duckworth – After a scoff like that for breakfast I’ll probably skip lunch. Hopefully it will be a nice clear day and I can continue taking in the view around the city by heading up to Pippy Park with some buddies for a round of golf. Walking that hilly course on a hot August afternoon will surely work up my thirst and appetite and by the end of it my mouth will be watering for a cold pint of local brew and some of the best fish and chips (fee and chee as the townies call it) the city has to offer. The best place for that combo in my opinion is The Duke of Duckworth, an English style pub with excellent atmosphere and a large selection of beer on tap. “The Duke” as it is affectionately known, is a landmark in the City of Legends and is likely even more popular since I have been there as it is featured on the hit CBC show The Republic of Doyle. While there are no shortage of good fish and chips places in Newfoundland, The Duke makes as good a feed of fee and chee as I’ve ever had. The fries are hand cut and the fish is fresh, flaky with a thin, crispy and bubbly batter. I’m salivating right now just thinking about it. In order to work this meal off and to prevent getting loggy, I dare say I’ll end up walking down to Shamrock City to listen to some much missed live Newfoundland-Irish music and possibly do a jig or two. It’s going to be a real scoff and a scuff kind of night.

Friday, July 8, 2011

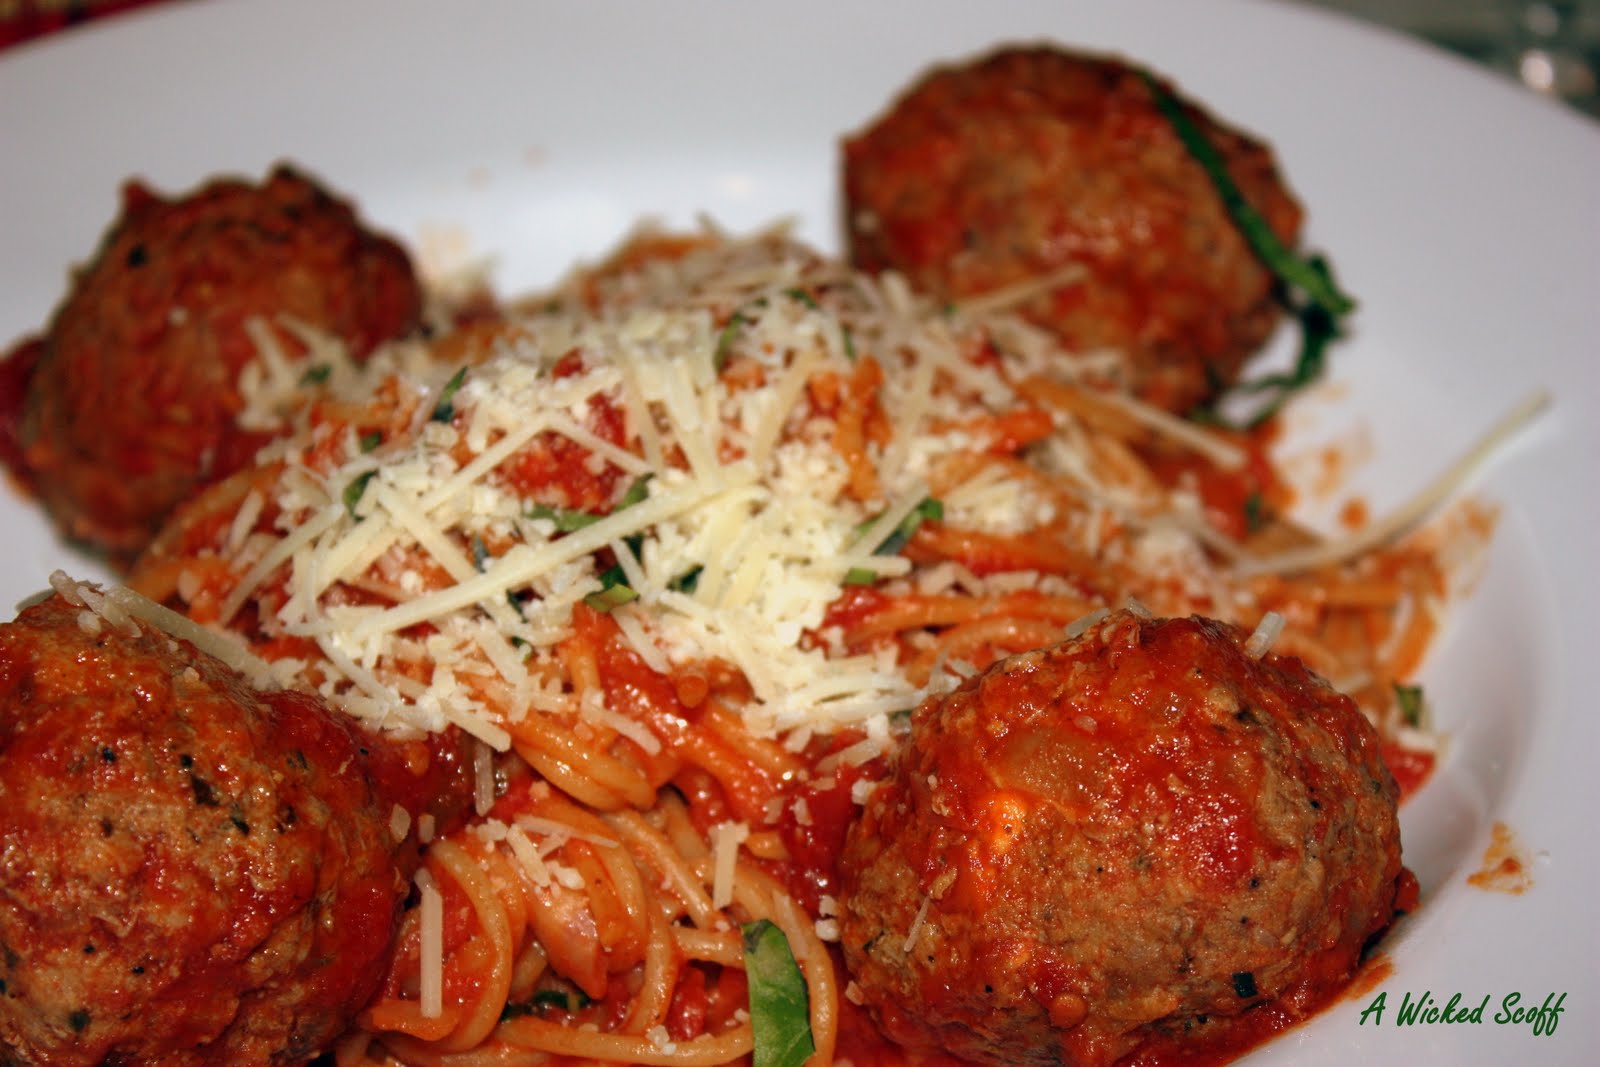
Spaghetti and Meatballs

Spaghetti and meatballs might not be very "east coast" but find me a household that doesn't love this Italian favorite and I'll eat my lobster trap. This recipe is very Italian as it uses sweet San Marzano tomatoes, lots of fresh Italian herbs and a combination of ground beef, veal and pork for the meatballs. Throw in some Parmesan and mozzarella cheese and you'll think you you've been transported to Napoli!

Neapolitan Marinara Sauce

The best Italian dishes are the simple ones, highlighting the flavors of good quality ingredients. This marinara sauce is so easy, you'll never pick up a bottle of the store-bought stuff again. The keys to this sauce are  the San Marzano tomatoes (which grow in the rich volcanic soils around Mt. Vesuvius in Italy), the fresh basil and the long, slow cooking. While San Marzano tomatoes are pricier than your average canned tomatoes, the quality and taste are unprecedented. You're still making a big pot of sauce for just over $6 so don't be cheap over the tomatoes.

Ingredients:

  • 2, 28 ounce cans of San Marzano tomatoes, squeezed in your fingers
  • 1 small onion, minced
  • 2-3 cloves garlic, minced
  • 2 Tbsp olive oil
  • pinch of dried hot chili flakes
  • salt and pepper
  • fresh basil leaves, chopped
Directions:


In a large sauce pan, or better yet a Dutch oven, heat the olive oil over medium heat and add the onions. Cook until they become soft and translucent, 2-3 minutes and add the garlic and chili flakes, and season with a little salt and pepper. Next add the tomatoes one at a time, squeezing them between your fingers as you drop them in the pot. This is very Italian! Once all the tomatoes are in there, add about half of your herbs and bring to a low simmer. Cover and cook at a low simmer for about an hour. Before serving add the remaining fresh herbs and taste for salt and pepper.

To make the absolute best spaghetti, and avoid getting a watery pool at the bottom of your plate, boil your pasta according to the package but remove when it is just under cooked slightly. Add enough sauce for the spaghetti (this works well in small portions) to a skillet and combine with the spaghetti and a little of the starchy pasta water (again, very Italian). Cook the spaghetti in the sauce until it it clings to the pasta and the spaghetti is al dente. Using tongs, plate the spaghetti and sauce on your plate and surround with meatballs. Top with more fresh herbs and grated cheese.

Moma mia!  bon apetito

Mozzarella Stuffed Meatballs

Ingredients

  • 3 pounds of meatloaf mix (or 1 pound each of ground beef, veal and pork)
  • 2 eggs
  • 1/2 cup milk
  • 1/2 cup breadcrumbs
  • 1/4 cup grated Parmesan or Romano cheese
  • 1/2 medium onion, minced
  • 2-3 cloves garlic, minced
  • 2 Tbsp each of fresh parsley, basil and oregano chopped
  • 1/2 tsp hot chili flakes
  • 1 tsp each of salt and pepper
  • fresh mozzarella cheese, cut into small cubes

Directions:

Add all the ingredients except for the mozzarella into a large bowl. Take off your rings and watch, wash your hands and get in there, mixing everything together well. Pinch off pieces of the mixture that area bit bigger than a golf ball (but smaller than a tennis ball). Working quickly, slightly flatten the ball into a patty and place a cube of mozzarella in the center. Next form the meat mixture around the cheese cube and form a rough ball. Pat it around between your palms so you have a perfectly round meatball. Lay down and keep the process going. While you can bake the meatballs off, I prefer to give them a sear on all side in a hot skillet with a little olive oil.You don't have to cook them all the way through as I like to finish the cooking by dropping the meatballs into the marinara sauce to finish. You can also finish them in a hot oven.

Thursday, June 30, 2011

Baby Back Ribs and BBQ Dry Rub

Smoked Baby Back Ribs

Real barbeque by definition involves slow cooking meat over a wood fire, infusing smoke and flavor while the meat becomes tender and succulent. What most of us do in our backyards is actually grilling, not barbeque...but that's okay. If you don't want to invest in a competition BBQ smoker or fuss with wood fires, there is a way to cook barbeque on your gas grill using a small metal smoker box and store bought wood chips. The process is still low and slow cooking, and by placing the smoker box over the gas flame and the meat indirectly (not over a flame) you can achieve BBQ that is pretty close to the real deal.

If you're planning on having the ribs for a later afternoon or evening dinner, start your prep work early in the morning or night before (if you have the time). Baby back ribs are more tender and less fatty than side or spare ribs. One thing that may make them less tender is a membrane on the bone side of the ribs called silver skin. If your butcher has not removed this, do so using a paring knife and your fingers. Once the ribs are free of the silver skin, season liberally on both sides with the dry rub see recipe below). Stack your rubs and wrap in plastic, and store in the fridge to marinate for a few hours.

All Purpose BBQ Dry Rub
  • 1/2 cup kosher salt
  • 1/2 cup dark brown sugar
  • 2 Tbsp paprika
  • 1 Tbsp chili powder
  • 1 Tbsp onion powder
  • 1 Tbsp garlic powder
  • 1 Tbsp allspice
  • 1 Tbsp ground black pepper
  • 1 tsp cayenne pepper
  • 1 tsp dry mustard
  • 1 tsp smoked paprika
Combine all ingredients, mix well and store in an airtight container. Apply to all your favorite BBQ and grilled food such as ribs, pork chops, chicken, burgers and hot dogs, and add to homemade BBQ sauce.

For cooking the ribs, allow about 4 1/2 to 5 hours for the cooking process. You'll want to slow cook the ribs for about 4 hours on low heat (225-250 degrees) and then cook them over a flame while basting in BBQ sauce for the final 10-15 minutes.

 To cook the ribs, light your gas grill and set the front burner to high and leave the rear burner off. Fill your metal smoker box with store-bought wood chips (many supermarkets carry these now in maple, hickory, mesquite and apple wood) and place it over the front burner. I find that there is no need to soak the chips for this technique. Once the grill comes up to about 225 to 250 degrees place your rib racks along the back part of the grill, including the small narrow upper gates if your grill has those.Stay by for the first little while as you calibrate your front burner setting in order to achieve an internal grill temperature of 225 to 250. If your grill thermometer does not work I'd encourage you buy an accessory one. When I made these ribs last week I achieved an even temperature of 230 and let the ribs go for four hours. Half way through I turned all the racks of ribs and dumped out some f the black wood chips and added some new ones. Warning, the smell of real bbq and wood smoke may draw in your neighbours so make sure to cook extra.

After the ribs have cooked for four plus hours they should be quite tender and able to be pulled away from the bone. You can eat them as they are (dry) and they will be delectable or you can turn on both flames and cook them further by basting them in homemade BBQ sauce (wet). I like both styles and often put a rack of dry aside. I usually coat one side of the ribs with sauce, turn and coat the other side, letting each side cook face down for about 2-3 minutes. I then repeat the process. Be carefull during this step as the sugar in the sauce can burn easily.

Serve up with some coleslaw, baked beans and other BBQ favorites like baked potato and you'll behaving some of the best BBQ you've ever made. There might be a bit of work involved but once you taste this it will be well worth it. Look out for the smoke ring in the meat once you bite in.

Monday, June 27, 2011

BBQ Chicken and Ribs with Beer BBQ Sauce

A Wicked Summer BBQ with Smoked  Babyback Ribs, Wings & Sauce
For most of you in A Wicked Scoff's reading audience, summer is upon us. To my friends, relatives and fellow Newfoundlander's at home, please accept my apologies as I know you are having a dreadful start to the summer season. Of all the things I miss about Newfoundland, June's capelin weather, which consists of day after day of rain, drizzle, fog and temperature hovering around the 10 degree mark (Celsius), is certainly not one of them. According to the forecast however, things are looking up. With warm sunny days come eating and cooking outside and firing up the grill. When it comes time to serving up your favorite grilled meats, whether it be chicken or pork, don;t reach for some store bought BBQ sauce. Instead whip up a batch of homemade sauce, featuring a healthy portion of your favorite beer. Keeping in line with my Newfoundland heritage this recipe calls for an ample amount of fancy molasses, and some of our own Jockey Club beer. You can use whatever beer you like however.

Last weekend was Father's Day and I used my BBQ Sauce on some grilled chicken wings and smoked baby back ribs. Here are a few pictures from the feast along with a recipe for my sauce, which gets basted on the meats for the final 5-6 minutes of cooking. I also like to serve it table side for dipping. I'll let you know how I prepared my ribs, along with a special BBQ dry rub later this week.

Jockey Club BBQ Sauce

Ingredients:
Babyback ribs about to receive a smothering of BBQ sauce
  • 1 small onion, minced
  • 2 Tbsp Canola Oil
  • 2 cups ketchup
  • 1 cup apple cider vinegar
  • 1 cup fancy molasses
  • 1 cup of Jockey Club (or your favorite beer)
  • 1/2 tsp of each of the following: garlic powder, paprika, chili powder, salt and pepper
  • 1 tsp allspice
Directions:


Sauced ribs, getting sticky in the final couple of minutes
In a medium sauce pan, saute the onions in the oil over a medium heat until tender and translucent, but not browned. Add all the remaining ingredients, stir well and bring to a simmer. Reduce heat to low and continue to simmer for about 30 minutes until sauce thickens a little. Apply to your favorite grilled meats for the final few minutes of cooking for a sweet, tangy and sticky BBQ sauce coating. I like to keep the sauce pan next to the grill and keep the sauce warm. Serve on the side as well for extra dipping. Goes great with pork chops, ribs and chicken!
Blog Widget by LinkWithin