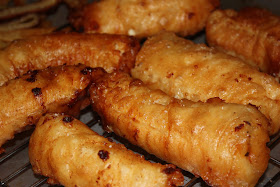
Tuesday, September 15, 2009

Chili


Now that NFL football season is upon us and Sunday tailgating and excessive munching has begun, I though it is time I release my favorite chili recipe. This hearty chili pack a bit of heat but nothing that can't be tamed by the sour cream, sharp cheddar cheese and the chips. If you like it hotter, simply add more of the chipotle peppers, or I would recommend letting your guests spice it up on their own with red pepper flakes or hot sauce. this chili will satisfy as it is very meaty with loads of beans and veggies. The dark chocolate helps balance the flavors of the chilies. Give it a try.

Directions

1 Tbsp Vegetable Oil


Heat oil over a medium-high heat in a large heavy bottom pot and add:

1 ½ lbs lean ground beef

1 ½ lbs ground buffalo


Cook until browned (but not necessarily fully cooked through). Set aside in a large bowl and mix with the following combination of seasonings:


Spice Mix

2 Tbsp Chili Powder 1 tsp Tabasco Sauce

2 Tbsp Paprika 3 Tbsp Worcestershire Sauce

1 Tbsp Ancho Chili Powder ½ tsp chili flakes

1 Tbsp Smoked Paprika 1 Tbsp black pepper

Pinch of Kosher Salt 1 Tbsp cumin


Reserve seasoned meat mixture for later.

In the same heavy bottom pot heat over medium-high:


2 Tbsp Vegetable Oil


Once oil shimmers, add and stir occasionally:

2 medium yellow onions, diced

3 green bell peppers, diced

Pinch of Kosher Salt and a few grinds of black pepper


Once onions and peppers cook for 3-4 minutes, add and stir occasionally

½ lb mushrooms, sliced

4 cloves of garlic, minced

3 jalapeƱo peppers, seeds and veins removed


Cook for 3-4 minutes and add:


Beef/Buffalo mixture

1 cup beef broth

1 small can tomato paste

2 large cans of whole tomatoes

4 chipotle peppers in adobe sauce, minced

2 Tbsp dark chocolate (77% cocoa), chopped


Additional spices to taste (chili powder, cumin, paprika, pepper, chili flakes, etc)


Cover and simmer the chili on a low heat on the stove top for at least 1 hour to combine the flavors.

10-15 minutes before serving, add:

1 can Dark red kidney beans, drained and rinsed

1 can Black beans, drained and rinsed


Serve in bowls topped with sour cream, sharp cheddar cheese and minced green onion and parsley or cilantro. Serve with multi-grain Tostitos to scoop up the chili goodness.


Enjoy!

Wednesday, September 9, 2009

Chicken Breast Roll-Ups

Last night I cooked what used to be a go-to meal for me, but also one I had not made as long as I could remember. In fact my wife said I'd never made it for her and we've been living together for four years now. The meal I'm referring to are chicken breast roll-ups. They're a pretty simple recipe, one I got some years ago out of the original volume of the Downhomer (now Downhome) Household Almanac and Cookbook ( http://www.shopdownhome.com/item.php?id=205). Basically that recipe called for chicken breasts pounded flat, dipped in a mixture of melted butter and Worcestershire Sauce, breaded in traditional Newfoundland savory dressing, tucked into a roll, and baked. These are quite tasty, and I especially loved them served with scalloped potatoes.

For some reason yesterday afternoon, this recipe popped into my head, and when I got home from work I was anxious to give it a try...but this time with a little twist. One thing I wanted to do was make use of things I already had on hand, for both the chicken roll-ups and for the side dishes. For the chicken, I knew I wanted to use savory, and I also knew I wanted to spice up the marinade. I had some fresh broccoli, as well as a large sweet potato and some Yukon gold spuds in the pantry. I also wanted to play along with the traditional savory dressing. I love using panko, but I felt that all Panko wasn't what I wanted, so I made fresh bread crumbs as well, out of some country potato bread I had left from this past weekend (I now refer to potato bread as the "where have you been all my life" bread..well I say the same thing about sourdough too). Lastly, I had some artisan cheeses leftover from a party this weekend and I snuck (to sneak) a piece of Gruyere into each roll-up. Anyways...here's what I came up with.

Chicken Roll-Ups

4 skinless, boneless chicken breasts, pounded to about a 1/2 or 3/4 inch thick

In a bowl or Pyrex dish combine the following
- 3 Tbsp Olive Oil
- 1 Tbsp Italian Salad Dressing
- 1 tsp Worcestershire Sauce
- 1 Tbsp White Wine
- 1 clove of garlic, minced
- 1/2 tsp chili flakes
- a dash of salt and pepper

Add the chicken breasts in the marinade and leave for about an hour.

For the breadcrumb dressing/coating, combine
-1 cup Panko breadcrumbs
- 1 cup fresh breadcrumbs
- 1 Tbsp dried summer savory, rubbed in the palm of your hand
- 1 Tbsp fresh parsley, minced
- 1/2 tsp of fresh black pepper

Preheat oven to 400 degrees and lightly grease and Pyrex dish large enough to hold 4 roll-ups.

One at a time, dredge the chicken breasts in the breadcrumb mixture. Try and get an even coast but some bare batches are fine. Lay a slice of cheese in the middle and roll up the breast. Lay seam side down in the dish and press some more of the breadcrumbs onto the top so that it has a complete crust. Repeat for the other three chicken breasts. Bake for approximately 25-30 minutes, or until internal temperature is 160 degrees and inner juices run clear.

Sweet Potato and Gold Potato Dollar Chips

For the spuds, I pealed 1 large sweet potato and 3 large Yukon Gold's, which gave me about an even number of chips. I sliced the spuds into thick round chips (think thick potato chips) that were about a 1/4 to a 1/3 of an inch thick. I call these dollar chips, and I've heard that around Newfoundland. I'm not sure what they're called elsewhere (these are also some good pan fried in shortening in a cast iron pan...that's the way Mom used to cook them for me for a nice treat when I'd come home for lunch from school some days). After soaking in water for a bit, I drained them and added a few "glugs" of vegetable oil, and seasoned them with 1 Tbsp of savory (I wanted to bring the savory into a couple of elements of the dish), 1 tsp of garlic powder, and salt and pepper.

To cook the potatoes I separated them onto their own baking sheet since the sweet potatoes cook quicker. I set them into the oven while I was prepping the chicken breast, and I hauled the sweet potatoes out after about 10-12 minutes, gave them a flip, and let them rest on the stove top. Once the chicken was done I popped them in for another few minutes to brown the other side. The Yukon Golds took almost as long as the chicken.


This was a super easy, and delicious meal! I got back to my roots and held true to my philosophy of keeping it simple, using what you have, seasoning it well and making it tasty!

Sunday, September 6, 2009

Mediterranean Pizza


This is one of my favorite pizza recipes, and it is one that features bright flavors of the Mediterranean region, namely pesto, sun dried tomatoes, roasted red peppers and artichoke hearts, paired with herb and garlic grilled chicken, thin sliced red onion, Parmesan cheese and grated part-skim mozzarella. The basil and garlic from the pesto carry through in every bite, while the sun dried tomatoes give a sweet tangy punch. Each bite is different, as you can bite into a quartered artichoke heart or into a juicy piece of grilled chicken. Whether you decide to make it pan pizza style or go for the crispy thin crust from the pizza stone, each variety has its special pleasantry. With the thicker, chewier crust the whole thing melds in perfect harmony and it deeply satisfying. The thin flat bread crust however let the topping stand out even more, and it transforms the pizza into something a little more sophisticated. Each will please you as I think the flavor combination here make for a truly outstanding pizza!

Mediterranean Pizza

See recipe for basic pizza dough from an earlier blog. This is enough dough for 2 large pan pizzas (cookie sheets) or 3 round pies on the stone.

This is a simple pie to put together as I use store bought pesto, canned quartered artichoke hearts, canned roasted red peppers and a jar of sun dried tomatoes in olive oil. The chicken is the most time consuming part (although this is a great way to use up any leftover chicken you might have), and then it's just slicing the onion and grating the cheese.

For the chicken, I like to marinate bone-in, skin-on chicken breasts in a little olive oil, lemon juice, minced garlic, chili flakes, Italian seasoning and black pepper, for at least a couple of hours. The I simply season it with some salt and grill the chicken (or roast it) until it is just done, at 160 degrees. When it is cool enough to handle, I pick the meat off the bone and give It a rough chop. 2 bone-in breasts are plenty for 3 pizzas.

To prep the pizzas, use the pesto as you would pizza sauce, and spared evenly across the dough. Next top with the chicken, artichokes, chopped sun-dried tomatoes , chopped roasted red peppers, a handful of grated mozzarella, thin slice red onion on top, and some Parmesan cheese grated around the edge of the crust. Cook it in the hot oven until the cheese browns and the crust has also browned on the bottom.

Let me know how it turns out!

Wednesday, September 2, 2009

Fish and Chips II

Beer Battered Deep Fried Cod


Every now and then you just got to have something fried. As I've said in previous posts, it's hard to find really good deep fried fish and chips in these parts, and it had become a goal of mine to start making my own. One a month, this will be a guilty pleasure. I do not own a deep fryer (fry-o-later) but that doesn't stop me from being able to deep fry...as long as I am careful. This time I used a wok, but I was without a thermometer so that I could control the temperature. I'll have that for the next batch of fish fry goodness. When deep frying on the stove top, you have to be extremely careful because trouble can begin without a moments notice. You can not let the oil get too hot (hence the need for a thermometer) and you can not leave it unattended. Too many times in Newfoundland a house burns to the ground because of someone cooking a feed of chips and either not being careful enough or worse yet, try and do so after getting home with a few too many black horse in them. If you don't feel comfortable using the stove top, deep fry only with a deep fryer.

I like to think that I know a thing or two about deep fried cod. Besides having eaten my share over the years, I've also worked the fryer at a couple fish and chips places in St. John's back in college. My most notable experience was as fish cook at the famous Ches' Fish and Chips (http://www.chessfishandchips.ca/home.html). While I did not have a hand in making the batter from scratch at Ches', as they have their own secret and special blend you just add water too, I did learn alot about the proper thickness of the batter, cod portion preparation, cooking temperatures and times, etc. For the recipe below, I use a homemade beer batter that is light and thin, that frys up crispy and bubbly. For the cod, I used thick loin fillets and sliced them into roughly 3 0z portions.

Directions

For the batter, in a large mixing bowl combine with a whisk:
- 1 1/2 cups flour
- 1 tsp salt
- 1/4 tsp black pepper1 Tbsp baking powder
- 2 beaten egg yolks
and add gradually, whisking constantly
- 1 cup of light beer

Allow to rest in the fridge for an hour or two. Before using, add 2 egg whites beaten. This will make the batter nice and light. In order to get the right thickness, I dip my fingers in the batter and begin to count until I can see my fingers to through the batter as I let it drip off. You're looking for a two count to see your fingers begin to show through the batter. Anything longer will be too thick and produce unwanted dough around the fish. If you need to thin your batter, add a little more beer to get it right. This is enough batter to cook at least 2 pounds of fish.

In a large pot, or deep fryer heat 3-4 inches of vegetable oil to 375 degrees.

While oil is heating, portion the cod into 3-4 oz portions, season with a little salt in flour, and dredge in some flour. The flour is key in having the wet batter stick to the fish. Once the oil comes up to temperature begin cooking the fish. Don't over crowd the pot and cook the fish in batches. Once a piece is done, transfer to a wire rack, season with kosher salt and keep warm in a low oven. To "drop" your fish into the oil, submerge the floured portion in the batter, hold from one end and let the excess drip off, and slowly lay the fish in the hot oil. Hold it for a few seconds and slowly release it away from you. Keep an eye on it and turn it once one side becomes golden brown. Getting the fish cooked right is pretty easy for portions this size. Generally speaking, when it is well browned, it is done just right.

Served with some hand cut oven fries, and lots of fresh lemon juice, malt vinegar and salt and this was some of the best fish and chips I've had. It was most definitely the best I've had in this neck of the woods. Enjoy!