A Wicked Scoff...Recipes and Food with Newfoundland and New England Influences.

This blog is dedicated to bring recipes, photographs, anecdotes, reviews and other insights on everything food related. As the name suggests, "A Wicked Scoff" will have a regional flare, a fusion if you will, of both Newfoundland and New England perspectives of the culinary world around me. Thanks for visiting and please come back often as updates will be frequent. Oh yeah, I also like tasting and cooking with regional beers. Expect a beer of the month, often paired with recipes.

Thursday, December 15, 2011

Newfoundland Style Chicken Breast Roll Ups

Last night I cooked what used to be a go-to meal for me, but also one I had not made as long as I could remember. In fact my wife said I'd never made it for her and we've been living together for four years now. The meal I'm referring to are chicken breast roll-ups. They're a pretty simple recipe, one I got some years ago out of the original volume of the Downhomer (now Downhome) Household Almanac and Cookbook ( http://www.shopdownhome.com/item.php?id=205). Basically that recipe called for chicken breasts pounded flat, dipped in a mixture of melted butter and Worcestershire Sauce, breaded in traditional Newfoundland savory dressing, tucked into a roll, and baked. These are quite tasty, and I especially loved them served with scalloped potatoes.

For some reason yesterday afternoon, this recipe popped into my head, and when I got home from work I was anxious to give it a try...but this time with a little twist. One thing I wanted to do was make use of things I already had on hand, for both the chicken roll-ups and for the side dishes. For the chicken, I knew I wanted to use savory, and I also knew I wanted to spice up the marinade. I had some fresh broccoli, as well as a large sweet potato and some Yukon gold spuds in the pantry. I also wanted to play along with the traditional savory dressing. I love using panko, but I felt that all Panko wasn't what I wanted, so I made fresh bread crumbs as well, out of some country potato bread I had left from this past weekend (I now refer to potato bread as the "where have you been all my life" bread..well I say the same thing about sourdough too). Lastly, I had some artisan cheeses leftover from a party this weekend and I snuck (to sneak) a piece of Gruyere into each roll-up. Anyways...here's what I came up with.

Chicken Roll-Ups

4 skinless, boneless chicken breasts, pounded to about a 1/2 or 3/4 inch thick

In a bowl or Pyrex dish combine the following
- 3 Tbsp Olive Oil
- 1 Tbsp Italian Salad Dressing
- 1 tsp Worcestershire Sauce
- 1 Tbsp White Wine
- 1 clove of garlic, minced
- 1/2 tsp chili flakes
- a dash of salt and pepper

Add the chicken breasts in the marinade and leave for about an hour.

For the breadcrumb dressing/coating, combine
-1 cup Panko breadcrumbs
- 1 cup fresh breadcrumbs
- 1 Tbsp dried summer savory, rubbed in the palm of your hand
- 1 Tbsp fresh parsley, minced
- 1/2 tsp of fresh black pepper

Preheat oven to 400 degrees and lightly grease and Pyrex dish large enough to hold 4 roll-ups.

One at a time, dredge the chicken breasts in the breadcrumb mixture. Try and get an even coast but some bare batches are fine. Lay a slice of cheese in the middle and roll up the breast. Lay seam side down in the dish and press some more of the breadcrumbs onto the top so that it has a complete crust. Repeat for the other three chicken breasts. Bake for approximately 25-30 minutes, or until internal temperature is 160 degrees and inner juices run clear.

Sweet Potato and Gold Potato Dollar Chips

For the spuds, I pealed 1 large sweet potato and 3 large Yukon Gold's, which gave me about an even number of chips. I sliced the spuds into thick round chips (think thick potato chips) that were about a 1/4 to a 1/3 of an inch thick. I call these dollar chips, and I've heard that around Newfoundland. I'm not sure what they're called elsewhere (these are also some good pan fried in shortening in a cast iron pan...that's the way Mom used to cook them for me for a nice treat when I'd come home for lunch from school some days). After soaking in water for a bit, I drained them and added a few "glugs" of vegetable oil, and seasoned them with 1 Tbsp of savory (I wanted to bring the savory into a couple of elements of the dish), 1 tsp of garlic powder, and salt and pepper.

To cook the potatoes I separated them onto their own baking sheet since the sweet potatoes cook quicker. I set them into the oven while I was prepping the chicken breast, and I hauled the sweet potatoes out after about 10-12 minutes, gave them a flip, and let them rest on the stove top. Once the chicken was done I popped them in for another few minutes to brown the other side. The Yukon Golds took almost as long as the chicken.


This was a super easy, and delicious meal! I got back to my roots and held true to my philosophy of keeping it simple, using what you have, seasoning it well and making it tasty!

Wednesday, November 2, 2011

Lasagna

Lasagna is as Italian as it gets, and here in North America is has to be one of the most popular comfort foods among the masses. With popularity however come variety, and the Internet is overwhelmed with variations from all over on how one can create this dish consisting of pasta, sauce and cheese.

To me, there are many ways to make an excellent lasagna, but for me personally there are a few key things I want mine to consist of. I like a rich, flavorful and meaty tomato based sauce, I like a layer of ricotta cheese blended with spinach, garlic and parmasan cheese, and of course there has to me lots of gooey, mozzarella on top.
Some lasagna recipes can be very complex with three sauces and two different cheese blends. For this recipe I use just one sauce (a meat sauce...although you can use whichever favorite tomato based sauce you like), a simple ricotta cheese mixture featuring spinach and artichokes (think hot spinach artichoke dip), and I finish it off with grated mozzarella.

Lasagna

Tomato Based Sauce: Check out my recipes for my family's meat saucebolognese or simple marinara.

Ricotta Mixture:

Ingredients:
  • 24 ounce tub whole milk ricotta cheese
  • 1/4 cup grated parmesan cheese
  • 1  package of chopped frozen spinach, thawed and drained
  • 2 eggs, beaten
  • 1 can artichokes, chopped
  • 3 cloves garlic, crushed
  • fresh chopped parsley (and other Italian herbs of choice)
  • 1/8 cup extra virgin olive oil
  • 1 tsp each of salt and pepper
Directions:

Combine all ingredients in a large bowl and mix well until evenly distributed. Reserve for layering in the lasagna.

Lasagna:

Ingredients:
  • Ricotta filling
  • Tomato or meat sauce
  • lasagna pasta, cooked
  • 2 cups mozzarella cheese, grated
  • 1/2 cup parmesan cheese (or other hard Italian cheese), grated
  • fresh chopped parsley
Directions:

If you don't have the tomato sauce made ahead of time, do that first as it is the most time consuming. The next step is to bring a large pot of salted water to a boil and cook the lasagna pasta just to al dente, according to package direction (I find 1 standard size package is more than enough, but I usually cook it all and let my pup enjoy the leftover pasta).While the pasta is cooking prepare the ricotta mixture. It's pretty simply to bring together. One of the most important things to do is insure the thawed spinach is squeezed of all its water as you don't want a watery filling. 

Once the pasta is cooked and cooled enough to handle, begin assembling your pasta. Preheat the oven to 375 and get a large casserole pan (approximately 9x13 inches or similar are typical). Ladle in a little red sauce, about 1.5- 2 cups to cover the bottom of the pan and then add a layer of lasagna noodles.Next add a thick layer of red sauce (about 3 cups) and a 1/4 cup of parmesan cheese, followed by a second layer of pasta. Next add the entire ricotta mixture and a third layer of pasta. Repeat with another thick layer of red sauce and the remaining parmesan cheese. Lastly, add the forth layer of pasta followed by a thin layer of red sauce and the 2 cups of mozzarella cheese. Cover with aluminum foil and bake for 30 minutes. Remove the foil and bake uncovered for another 15 minutes is until the top is browned and bubbly. Serve with a nice green salad, garlic bread and a good red wine.

Thursday, October 20, 2011

Jiggs Dinner

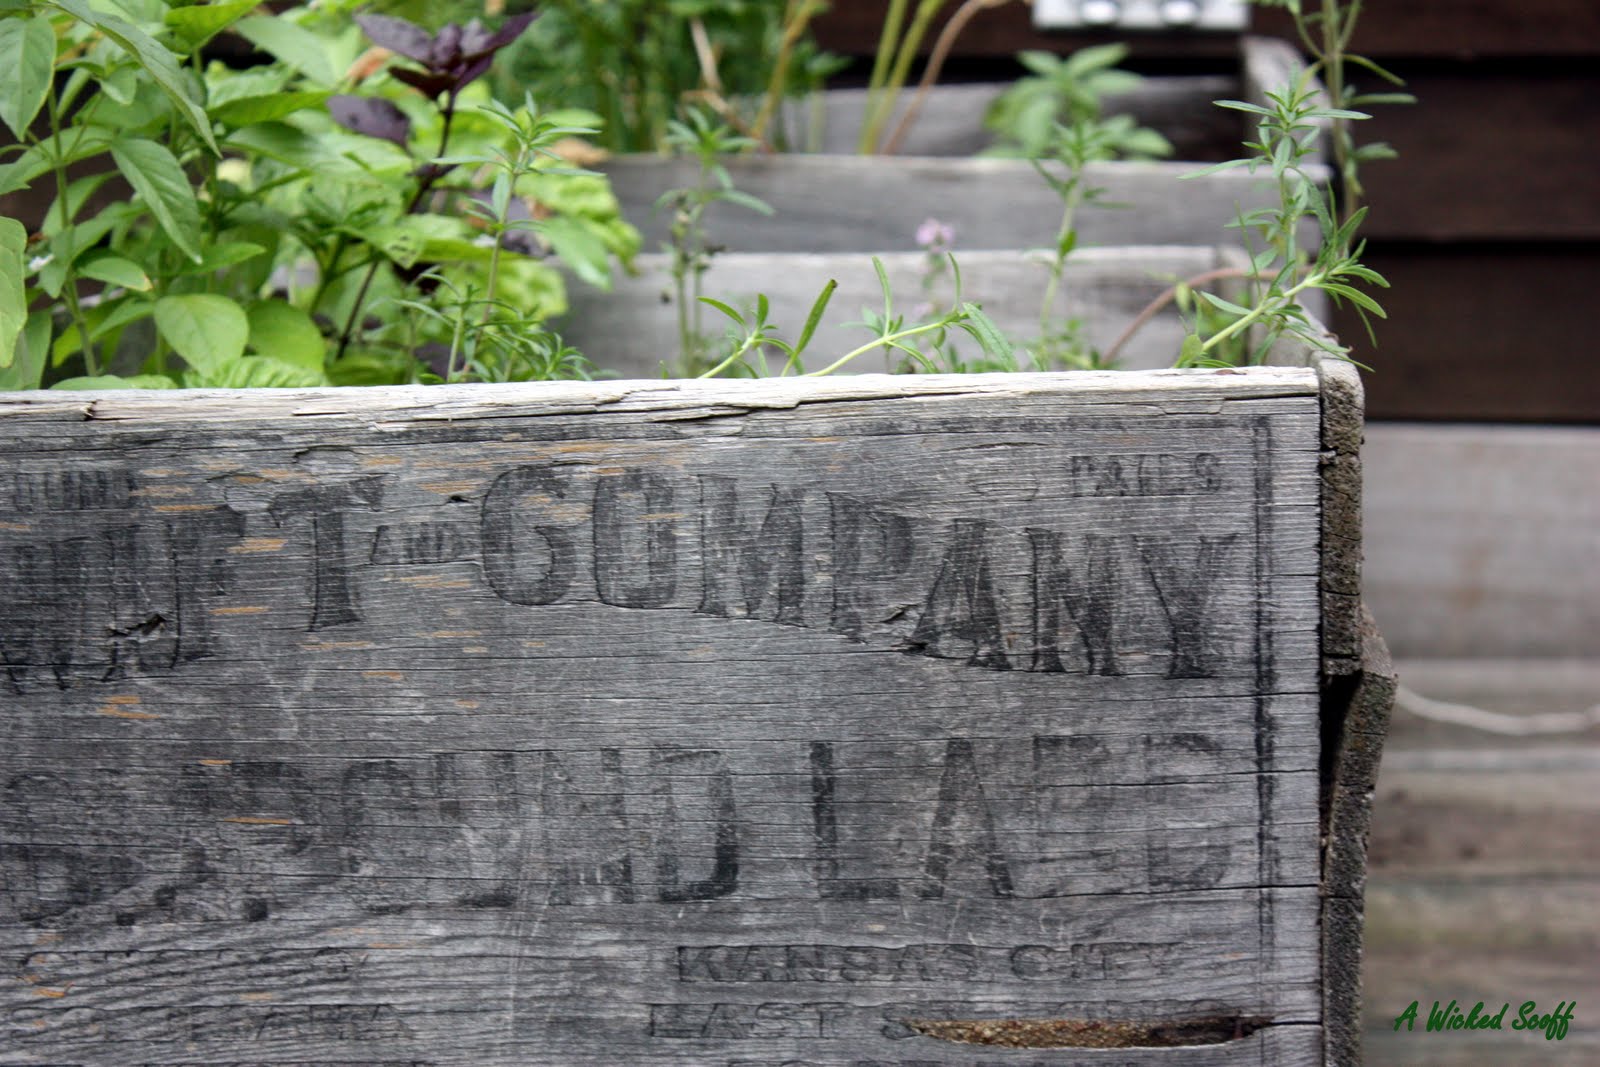
Here is one of A Wicked Scoff's first blog posts, and it is the second most popular among visitors to this blog. While I promise I have many new fall recipes and photos to share, I hope this recipe rewind will tide you over until I get some new posts completed. Thanks for stopping by.

This wouldn't be much of a blog on Newfoundland and New England cuisine if I didn't dedicate a couple of entries to Jiggs Dinner, New England Boiled Dinner or whatever it is you call your salty cured meat boiled along side a crop of winter vegetables.

Here it is, well Part I at least. For this post I'll talk a little about these classic regional dishes, notably the different names given to each, as well as the differences in their ingredients and preparation. Both dishes are a derivative of "Corned Beef and Cabbage", a dish associated with Ireland. While New England Boiled Dinner has not wavered much from the original, Newfoundland's version, faithfully called Jiggs Dinner, is a little more unique.


It is generally agreed these days that the name Jiggs Dinner, referring to the common Newfoundland meal of salt beef (or salt pork spare ribs), boiled vegetables and steamed pudding got its name from the popular comic strip "Bringing Up Father", which began back in the early 1900s. In that comic, the main character was an Irish lad named Jiggs, whose favorite meal was corned beef and cabbage. While the Newfoundland version does not have corned beef, but instead uses a fattier cut of trimmed naval beef (cured), the similarities were obviously close enough that the label of Jiggs Dinner stuck somewhere along the way and became entrenched in Newfoundland food lore.

Besides being called Jiggs Dinner, Newfoundlander's also call this dish consisting of salt meat, cabbage, potatoes, carrot, yellow turnip (actually rutabaga) turnip greens, and pudding (yellow split pea is most common, but a blueberry or figgy duff is also traditional), boiled dinner, and salt meat dinner. For my family, and like many other from across the province, this meal was often accompanied with a roasted piece of meat (chicken stuffed with savory and onion dressing, roasted pork or roast beef) and served on Sunday's...every Sunday! Traditional condiments for the meal include mustard pickles and pickled beets. For this meal of the extra fresh meat and delicious gravy, the term Jiggs Dinners may be dropped and replaced by "cooked dinner" or "Sunday Dinner". Finally, it is quite important to cook plenty so there are ample leftovers for hash on Monday! Somewhere along the way in history, Newfoundland became associated with the fatty cut of trimmed naval beef we know as "salt meat" instead of the leaner and meatier corned beef. It probably had much to do with price and the relationship between what merchants made available to Newfoundland outport fisherman and also to what would last the longest in the brine. Most Newfoundlander's though do not seem to mind and are "salt beef junkies" through and through.

Moving south to New England, or "the Boston States" as often refereed to back in the day by Newfoundlanders and Maritimers alike, the traditional boiled dinner consists of corned beef (usually brisket, either a flat cut or point cut piece, but also a cut of round) and many of the same winter vegetables, notably cabbage, potatoes, carrots, turnip, parsnips and beets. What we don't see are the use of steamed puddings, roasted meat and gravy does not get paired with the meal, and a new range of condiments are used to accompany the meal.

Here is a comparison breakdown:
Newfoundland Jiggs Dinner .............. New England Boiled Dinner

Meat

Salt Beef (trimmed naval beef) .....................Corned Beef
or Salt Pork Spare Ribs ..................................(flat cut/point cut brisket/round)

Veggies

Cabbage ..........................................................Cabbage
Potatoes (often blue spuds) .........................Potatoes
Carrot.............................................................. Carrot
Rutabaga .........................................................Turnip
Turnip (Rutabaga) Greens ...........................Parsnip
Onion ...............................................................Onion
...........................................................................Beets
...........................................................................Brussel Sprouts

Side Dishes

Pease Pudding (Yellow Split Peas)
Figgy Duff
Blueberry Duff
Bread Pudding
Potato Cakes with salt pork belly
Roast of chicken, pork or beef
Savory Dressing

Condiments

Pickled Beets ....................................................Grainy Mustard
Mustard Pickles ...............................................Mustard Pickles
Gravy ................................................................Vinegar
.............................................................................Horseradish

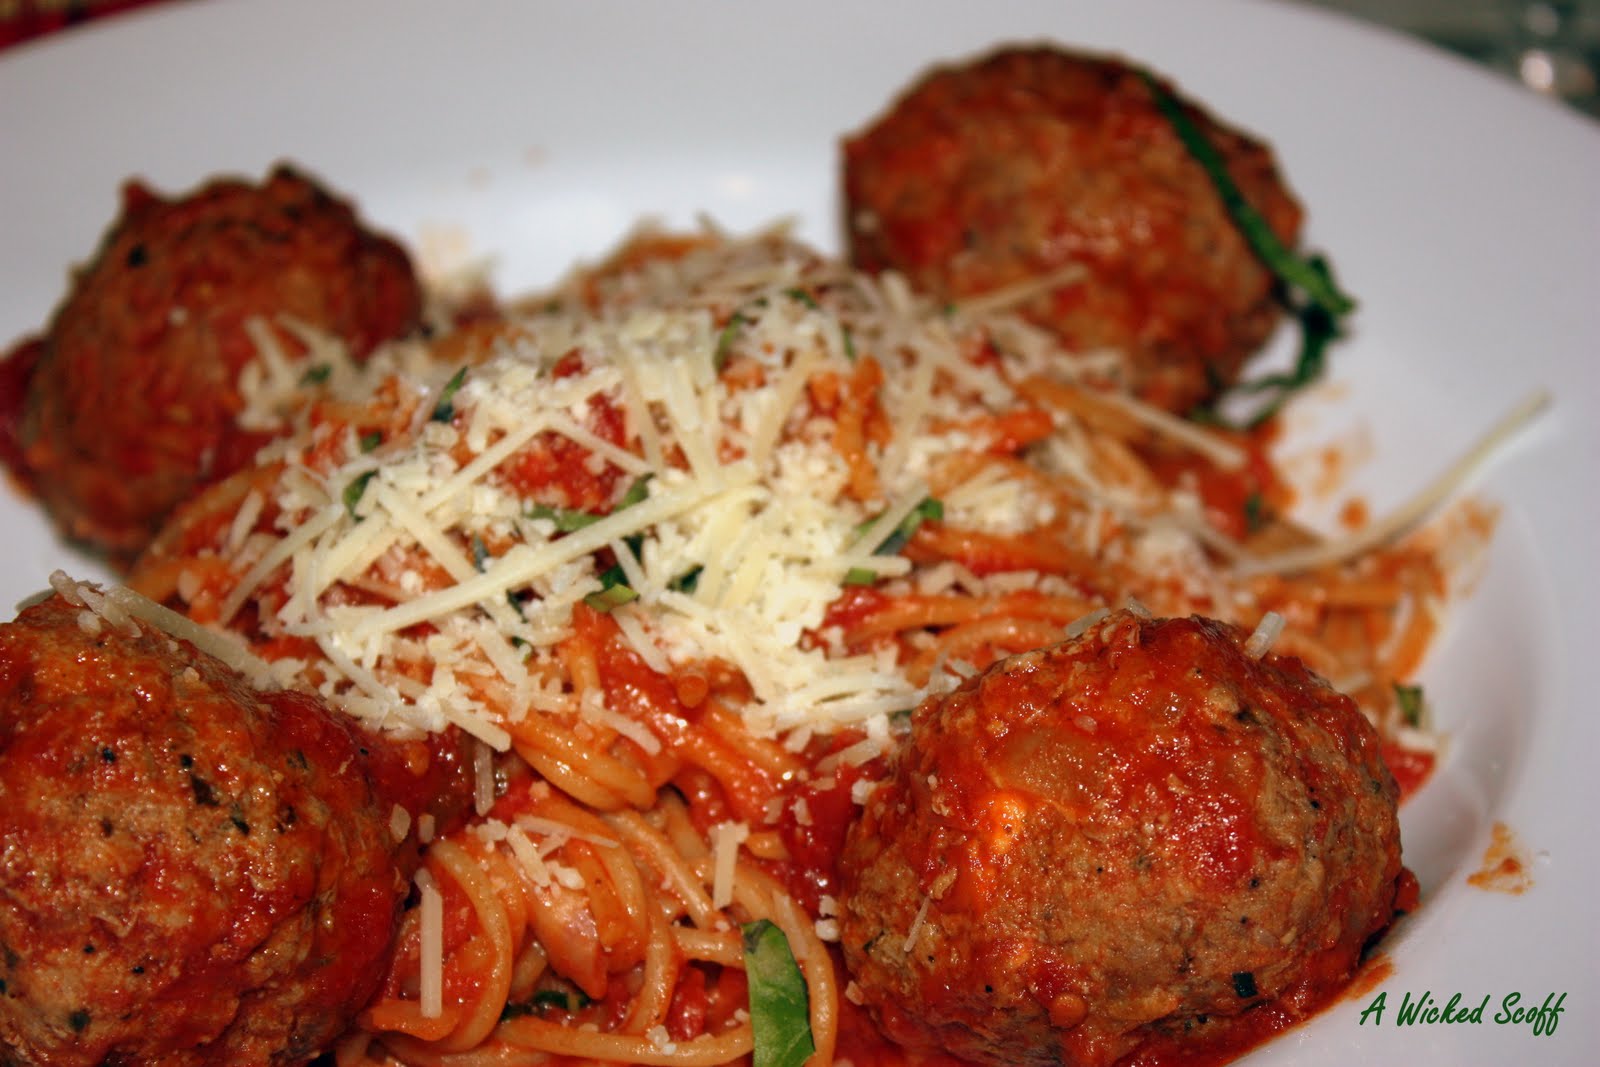
So there it is, the differences between Jiggs Dinner and New England Boiled Dinner. This past Sunday I made my own version of these dishes, a bit of a fusion between the two. I have fallen in love with corned beef. While I've always loved the flavor salt beef put on this meal, I've always thought it to be too fatty and not meaty enough for my taste. Corned beef fits the bill and makes for some awesome hash, not to mention Reuben sandwiches.


Jiggs Dinner and Corned Beef and Cabbage. Since I love roasted meat and gravy, I always include it when I make this meal. This past weekend it was a whole roasted chicken, minus the stuffing (I had a lot going on, plus I ran out of savory at my in-laws house). I trussed the chicken, seasoned it entirely with olive oil, salt and pepper, and roasted it uncovered with one chopped onion for about 1 1/2 hours at 350 degrees, basting every 10 minutes for the last 30 minutes of cooking. At the end I sprinkled a little fresh rosemary from my herb garden. Besides the wonderful taste of the roasted meat, and the bonus of rich tasty gravy, the addition of a roast allows the corned beef to go farther, thus leaving some for leftovers.

With that being said I also cooked a corned beef brisket (flat cut). I purchased a 4 lb brisket and cooked it on a low simmer for 3 hours. I place the corned beef in a large stock pot and cover it with water. I watch it for the first 10 minutes or so to get the simmer just right. A rolling boil will not do any kindness to the corned beef. Low and slow is the way to go for this cut of meat. Once I had it just right, I went off for a 90 minute bike ride and came back in time to pop the chicken in the oven and start my veggies.

While I often make pease pudding (yellow split peas are easy to find here, and I have a couple of pudding bags), I opted out this time. My loss I know! What I did do was cook rutabaga for a mashed rutabaga side dish, carrots, new baby white and red potatoes, cabbage, and some onions. When my mom makes Sunday Dinner, she has a time chart of when everything goes in the pot as for it all to be ready at the same time. This method is so affective that even my father is able to cook this meal from start to finish all by himself, as long as he follows the directions EXACTLY. He is culinaryly challenged to say the least! For me however, I do things a little differently. I don't enjoy the "rush" of having everything ready at the same time. I like to get the turnip/rutabaga done a bit early so I can get em mashed up and put aside in a covered casserole dish. I also like to get the roast/chicken done a bit early so: A) I can turn the oven to low; B) I can let the meat rest before slicing; and C) so I can spend quality time making some really good gravy. Not only does cooking a few things early cause less mayhem at the end, it also assures that your veggies don't get horribly overcooked and fall apart. Here's how I do the veggies and gravy, one by one:

Mashed Turnip/Rutabaga

For the rutabaga, I cook them in a second stock pot. I add some tap water and a number of ladle fulls of the stock from the corned beef. To prep the rutabaga, using a heavy chefs knife I cut it in half, and then lay each half on the flat side and cut 1/2 inch thick half moon shaped slices. I then peel on the rind and that's it. I drop the rutabaga in the pot, bring it to a boil, and reduce the heat to simmer. At this time, I also add two yellow onions, peeled and halved. The onions makes a nice addition to the meal.

The rutabagas will take some time, up to 30 minutes. Check then regularly with a fork until done. I add them to a casserole dish, with a tsp of fresh cracked black pepper, 2 Tbsp of butter, and mash them until well incorporated. Keep warm in the oven until ready to serve. Then top with fresh parsley.

Potatoes and Carrots

This is the easiest part of the meal. For the carrots I just peel'em, cut them in half, and cut the thick part in half again, so they are all about the same size. For the new baby potatoes, I just give them a wash under cold water. The carrots and spuds get added to the pot of turnip/rutabaga and will take about 20 minutes. Check them with a fork and once tender, put them on a platter and keep in the warm oven.

Cabbage

Well maybe the cabbage is the easiest part. All you have to do is quarter it and give it a wash. I cook it directly with the corned beef. The New England recipes seem to call for a quick 10 minute cooking time, while I've seen recipes for Jigs where the cabbage is the first vegetable added. I like to go in between, and give the cabbage about 25 minutes, so it is tender, but not falling apart too much.

Chicken and Gravy

As I already mentioned, it's a good idea to have the chicken finished a bit early. Once it is done (use a thermometer if you are not sure...160 in the breast, 175 in the thigh) and transfer to a platter, and keep warm in the oven. The rich chicken drippings, and the chopped onion make a great base. I add 4-5 cups of pot liquor (stock) from the corned beef and some water or canned chicken broth, depending on how much I need to make. I place the roasting pan on the stove top over a medium-high heat. Using a wooden spatula or whisk I scrape all the browned bits away from the pan, as this adds major flavor to the gravy. To thicken the gravy, I use a combination of flour and corn starch. I add 2 heaping Tbsp of each to a small mason jar and add a little water. Give it a good shake as to make it lump free and you have a "slurry" that will thicken your gravy. Once the gravy liquid is at a rolling boil, begin whisking in the slurry, until it reaches desired thickness. Reduce heat to low and add gravy browning to get the color right. Taste for salt and pepper. The key here is to let the gravy cook on low for about 10 minutes. This cooks off any of the raw flour taste and lets the flavors meld. and the thickness to get just right.
All in all this meal was a huge success. My in laws love it, and they're glad they have the opportunity to having such a feast on more than St. Patrick's Day. For me, this is a part of who I am. Jiggs Dinner or Sunday Dinner is a profound element of Newfoundland culture and food lore. This is my way of making a connection of where I come from through the food I eat, and a way to have one of my favorite meals a little more often.

Friday, October 7, 2011

Recipe Rewind...Newfoundland Split Pea Soup


The Wicked Bodhran Master himself Sean McCann
shares a few tips with the Wicked Newfoundlander before a
show at the Iron Horse in Northampton, MA Oct 3, 2011.

Earlier this week I met some of Newfoundland's finest musical talent all the way down here in the Boston States. Sean McCann of Great Big Sea fame has embarked on on a small US tour with his band The Committed featuring great fiddler Kelly Russel and guitarist Craig Young. In addition to being an excellent singer, guitar player and song writer, Sean is a master of the Irish drum the bodhran, and I was fortunate enough to win a meet and greet contest with Sean as well as a free bodhran lesson before the show. I've been playing the bodhram for a couple year now but still have much to learn. thanks to Sean I've picked up some excellent tips that I'll be putting to practice. Besides the lesson and meet and greet, the concert was outstanding. We had front row seats and the boys rocked out with songs off Sean's latest CD Son of a Sailor, some tunes from his debut CD Lullabies for Bloodshot Eyes, in addition to a couple recognizable Great Big Sea shanties, an original song by Craig and some traditional Newfoundland jigs and reels from Kelly. We were left wanting more and are looking forward to the next time they're down in this neck of the woods. For a taste of the music check out Great Big Sean and do yourself a favor and buy the CDs. They are wicked good!

As a little tribute to my recent encounter with Sean McCann and the Committed here's a recipe repeat for a traditional Newfoundland soup. An old Newfoundland celebrity cookbook of mine featured a recipe for Sean's pea Soup and Doughboys, so like a good Newfoundland gaffer such as himself I'm sure he enjoys a feed of pea soup whenever he's back on the north shores of Conception Bay where the winds can blow right through you. Enjoy again.

I doubt if there is a single grandmother in Newfoundland, or "nan" as we like to call them, that doesn't make the best pot of pea soup. This traditional French-Canadian habitant pea soup, made with yellow split peas, a left over ham bone and some vegetables has been a staple for families both in Newfoundland and New England. The recipes I've seen from both regions are nearly identical, with yellow split peas, a meaty leftover ham bone or salt meat or salt pork if you don't have one, and then roots veggies such as onion, carrot, celery, turnip and potatoes. In Newfoundland it's traditional to serve "doughboys" with pea soup, a simple dumpling made with flour, baking powder, salt and water or milk, which are steamed atop the soup just before serving.

Last week I had a craving for peas soup, something I refused to eat as a kid because of the smell. For the most part I followed the recipe in Book 9 of Traditional Recipes of Atlantic Canada, however I made a few changes.

Unfortunately I did not have a meaty ham bone What I did have at my grocery store however were smoked ham hocks, which are almost just as good. I also avoided soaking the peas and I added more water. I have never found that soaking the peas overnight saves any noticeable difference in cooking time. Plus I found that using 8 cups of water means I have to add more. Lastly, instead of the 2 cups of peas in the book recipe, I added 1 pound, which happens to be one bag. I didn't measure it but it's not too far off 2 cups. Lastly, I love savory, and I added some of it near the end. I also saw savory in a traditional New England version of this soup. We're not so different you know. Here's how I put it all together.

In a large, enamel coated cast iron Dutch oven, add:
- 12 cups (3 quarts) cold water
- 2 smoked ham hocks (or 1 large meaty ham bone)
- 2 bay leaves
- bring to a boil, reduce heat and simmer for 1 hour

Meanwhile pick through (for stones) and risne:
- 1 pound of yellow split peas

After the ham hocks/bone have cooked for one hour, add the peas, stir and simmer for another 1 1/2 hours.

Meanwhile prep your veggies:
- 1 large onion, diced
- 3 carrots, dices
- 3 stalks celery, sliced
- 1/2 a large rutabaga/turnip, small dice
- 2 large russet potatoes, cut into 1 inch chunks

Add the vegetables and 1 tsp of dried savory (rubbed between your fingers), and cook until the vegetables are tender and the soup has thickened. Taste and season with salt and black pepper.

For an extra treat make some doughboys and serve hot on a cold winter night!

Wednesday, September 14, 2011

Cod Tongues and Tarter Sauce

There are so many things to enjoy when I go back home to Newfoundland. From spending time with family and friends, hiking along the rugged coast, and taking in live music in St. John's, and one of the things I look most forward to is getting out in boat to catch a few cod. As luck would have it this year, our vacation was well timed with Newfoundland's recreation cod fishery. Thanks to my cousin Tony who has a boat and a love for out on the water,  mom, my wife and myself had a morning out fishing in Trinity Bay. While the fishing was slow at first, and the skies threatened to rain much of the morning, we eventually found the fish and had no trouble getting our quota of 15 beautiful cod. I myself was extra lucky having pulled up the biggest catch of the day, a 17-pounder. While the sport of cod fishing is fun, that's no the main reason I do it and look forward to it however...it's all about the fish!

There is nothing like eating fish "straight out of the water" as we like to say in Newfoundland. Eating fresh cod, that just a few hours before they hit your plate were swimming around at the bottom of the North Atlantic Ocean, is a special treat. For many years all Newfoundlander's likely took that for granted, but since the moratorium on the Atlantic Cod fishery, which was mandated by the federal government in 1993, we certainly cherish the opportunities to eat this wonderful fish these days. So, tradition in our house is to have a wicked big feed of pan fried cod when I'm home for vacation. While the fish fillets get the star treatment for this meal, it's the appetizer of fried cod tongues that I look forward to most.

For those of you who do not know, cod tongues are not actually tongues, but a small muscle from the neck of the fish, which is succulent and it has a different texture than the fillets. It also has a little cartilage like material through the middle, which melts tender while cooking if the tongues are not too large. To me, they taste like the ocean, a little briney, sweet and juicy. The best thing I can compare them too are fried oysters or whole belly clams. What ever the case, they're some good. In Newfoundland the traditional way to cook them is to bread them lightly in seasoned flour and pan fry them in fat rendered from salt pork. I stayed pretty close to tradition for mine, and also made a tangy tarter sauce for dipping them in.

Fried Cod Tongues

  • 2 lbs fresh cod tongues, washed and dried
  • 1 cup flour, season with 1 tsp salt and 1/2 tsp pepper
  • 4 ounces of salt pork cut into small 1/4 inch cubes (scrunchins)
  • 2 Tbsp vegetable oil 

Wash the cod tongues and dry with paper towels. Toss in the seasoned flour until lightly coated. Cook the salt pork in a skillet over a medium until the pork pieces are crispy and have released or rendered their fat. Add the vegetable oil to the skillet. Fry the cod tongues over medium-high heat until crispy and golden brown on each side. Eat them plain or dip them in this simple, tangy tarter sauce.

Tarter Sauce

In a small bowl, combine 1 cup of salad dressing (such as Miracle Whip), 3 Tbsp of sweet pickle relish, 1 Tbsp lemon juice, 1 Tbsp Worcestershire sauce and a pinch of salt and pepper.

Wednesday, September 7, 2011

Cod Au Gratin Recipe

There is a school of thought in the culinary world that pairing seafood and cheese is somewhat of a no-no. This is especially true in Italian cuisine as it relates to seafood pasta and cheese. For people who turn their nose up to seafood and cheese, they have probably never enjoyed rich lobster mac-n-cheese, a warm cheesy tuna melt, seafood pizza or my favorite cod au gratin. Growing up in Newfoundland where fresh or frozen cod fish was always close at hand, this rich, cheesy casserole of cod, white sauce, cheddar cheese and bread crumbs was a staple. With that being said, there are variations on how people make it, namely the ratio of butter, flour and milk in the white sauce, how the dish gets layered and whether or not to add onion.After much experimenting over the years and tasting some not so successful versions of this classic meal, here is A Wicked Scoff's version of cod au gratin.

Cod au Gratin.(serves 4 as a main course)

Ingredients:
  • 2 lbs cod fillet (you can use haddock, sole or other white fish)
  • 1/4 cup butter, plus 1 TBSP
  • 1/4 cup of all-purpose flour
  • 2 cups whole milk
  • 1/2 medium yellow onion, minced
  • 1 1/2 cups sharp or old cheddar cheese, grated
  • 1/2 strong aged cheese such as Parmesan of Pada Gradano, grated 
  • 1 cup Panko-style bread crumbs (lemon pepper flavor if available, if not add lemon zest or lemon pepper)
  • 1 tsp dried summer savory, rubbed
  • salt and pepper
Directions:

Preheat oven to 350 degrees. In a microwave safe bowl, combine the minced onion with 1 tablespoon of butter and cook on high for 45 seconds, or until the onion had softened and butter has melted. Add the butter and onions to a 9x9-inch casserole pan (or similar size) and arrange cod fillets over the top (Many recipes call for you to break the cod into pieces after it has precooked, but I like to keep the fillets whole and break into them during plating once the casserole is finished. I feel the former method can make the fish flesh breakdown too much and thus you lose some texture and he fish gets overcooked). Season the fish with a little salt and pepper. Place in the oven and cook for about 10 to 15 minutes while you make the sauce. 

In a medium sized sauce pan melt the butter over a medium heat and then stir in the flour with a wooden spoon. Reduce the heat to low and cook the flour and butter mixture, known as a roux, for about a minute. While this is cooking warm the milk in the microwave to take the chill off. Using warmed milk will make the white sauce thicken much more quickly. Return the heat to medium, and with a whisk in one hand, slowly pour in the milk to the sauce pan, whisking as you pour. I typically pour a bout a 1/2 cup of liquid in at a time, waiting for the sauce to thicken between pours.After all the milk has been added and the sauce has thickened, reduce the heat to low and add 1/2 cup of cheddar cheese and 1/2 cup of Parmesan cheese, the savory and a pinch of salt and pepper. Remove the fish from the oven and pour any of the liquid that escaped from the fish into the casserole dish into the white sauce and stir it in. This is a trick I use to prevent the casserole sauce from thinning out once combined. Pour the cheesy white sauce over the fish fillets and top with the remaining cup of grated cheddar cheese.To prevent the top of the casserole from turning chewy, a layer of bread crumbs which protects the cheese and also adds great flavor and crunch. While homemade bread crumbs work great, I like using Panko breadcrumbs (a Japanese style breadcrumb now available at most grocery stores). In fact, for my latest edition of this recipe I used lemon pepper seasoned Panko and the result was outstanding. If you can't find these then feel free to add fresh lemon zest or lemon pepper spice. Increase the oven temperature to 400 and return the casserole to the oven and cook for another 15 minutes until the sauce is bubbling, the cheese has melted and the bread crumbs have browned.

Cod au Gratin is an extremely satisfying comfort food. It makes for an excellent appetizer or as a main course with some steamed vegetables, a salad and a nice piece of bread.

Enjoy!

Thursday, September 1, 2011

Moose "Barrenland". Tender moose braised in blueberry-partridgeberry wine with moose stock and aromatic vegetables.

Before my recent vacation back home to Newfoundland, I was very excited to eat as many local products as I could, as well as try a few restaurants, both new places and old favorites. I was not disappointed as I was able to get my hands on lots of fresh seafood, berries, local wines and beers in addition to trying some creative restaurant fare. One of the things I was most excited about on my trip was a rare opportunity to cook with moose. While I do get to use "bottled moose" occasionally down here in the Boston States, as followers of this blog may know, actually cooking with raw moose is something I haven't done in years. Thanks to my generous uncle, there was a large bone-in roast and a pack of short ribs from a central Newfoundland moose waiting for me at my parents house upon my arrival in Trinity Bay.

For some time now I knew what I wanted to do with the moose. I am a big fan of braised meat, a one of my favorite ways to eat it is slow cooked with lots of onions in some beef stock until it is extremely tender. Playing along those lines,  I really wanted to put my own Newfoundland spin on it, to make the meal a truly wicked scoff. Part of our vacation took my wife and I to New World Island off Newfoundland's north-central coast. Known for its scenic fishing villages, great hiking and its prominent location in "Iceberg Alley", this little part of Newfoundland can also boast excellent wine.

Auk Island Winery in Durrell's Arm, South Twillingate Island, features a large variety of wines featuring local Newfoundland berries and fruit, such as blueberries, partridgeberries bakeapples and rhubarb. In addition to offering sweet dessert wines, and semi-dry fruit/berry wines, Auk Island also paris the above mentioned native berries with varieties of grapes to make blended wines that are a litter drier than typical berry wines, thus making them great wines for all occasions, including pairing with food (for example try the blueberry-shiraz) and for cooking. While we were there we couldn't decide which few to buy, wanting a couple to bring back into the States, so we bought a whole case, having lots to sample with family and friends during our stay. The one that caught my eye for both drinking and cooking with was their Moose Joose, a blend of blueberries and partridgeberries, and presumably summer grazing food for Newfoundland moose.

So, back to the moose. With the Moose Joose wine, my dish planning was in order. Since blueberries and partridgeberries grow on Newfoundland marshes and barrens, I decided to called my braised dish "moose barrenland"...sort of a play on "Boeuf Bouruignon". Now that I had selected the wine to cook the moose with, I needed some other ingredients. Using classic braising vegetables I combined browned moose pieces (seared in small batches a little oil) with onions, carrots, celery and garlic, a whole bottle of Moose Joose, three cups of moose stock, a little tomato paste for body, some flour to thicken the sauce, and some salt and pepper. Cooked low and slow for 3 1/2 hours and I ended up with succulent morsels of moose with a rich, flavorful sauce. Paired with some buttery mashed potatoes, carmalized onions and mushrooms and steamed vegetable and my family and I were well fed with a dish to remember. Here's how I put it together. Remember if you don;t have moose, any wild game would be great paired with the wine, as would beef.

Moose Barrenland


Ingredients:
  • one 4-6 pound bone-in moose roast, bone removed and meat cut into stewing pieces
  • 3 large yellow onions
  • 6 large carrots, diced
  • 3-4 cloves of garlic
  • 2 Tbsp tomato paste
  • 2 Tbsp butter
  • 2 Tbsp flour
  • 3 cups moose stock (or beef stock)
  • 1 750ml bottle of blueberry-partridgeberry wine
  • 1 tsp dried summer savory
  • salt and pepper
  • vegetable oil for searing moose
  • 2 bay leaves

Directions:
  • The first job is to remove the meat from the bone. This is best done ahead a time so you can make the stock.Working carefully with a sharp knife, follow the individual muscles and remove them from the roast. Be sure to trip off excess fat and silver skin which can be tough to eat. Once all the meat has been removed, cut the moose into stew pieces, about 1 inch in size. Set aside as you'll use the bone to make a rich moose stock.
  • In a 325 oven, add the meaty moose bone, along with 1 chopped onion and about 3 cups of water and a bay leaf to a small roaster and cook for about 90 minutes. Remove from oven and strain liquid, which should yield about 3 cups of stock.
  • In a heavy bottom Dutch Oven or cast iron skillet, heat about 1 Tbsp of vegetable oil over medium high heat. Dry the moose pieces with a paper towel and season them well with salt and pepper. Sear and brown the moose in small batches and set each batch aside until all the moose has been browned. You may have to add more oil between batches. It is very important to keep the batches small (3-4 batches for this amount of meat) as overcrowding the pan will lower the temperature and you won't get a good sear. What will happen is the meat will give off moisture and you'll end up with steamed meat with no browning. Browning equals flavor!
  • After the moose has been browned, the chopped onions and carrots to the pan, along with a pinch of salt. Lower the heat to medium. Stir the veggies around the pan with a wooden spoon, making sure to scrape off the "fond", the browned bits of flavor stuck to the bottom. The veggies will absorb and release the fond, and the salt will help with this process.
  • Next add the butter, garlic, flour and tomato paste and stir well with the veggies. Cook for a bout one minute.
  • If you cooked the moose and veggies in a Dutch oven, and the vessel you plan to braise in add the moose. If you browned the moose and veggies in a cast iron skillet transfer everything to a roasting pan. 
  • Deglaze the bottom of the pot with the wine and beef stock, add the dried savory, bay leaf and some salt and pepper. Mix all the ingredients and place covered in a 325 oven for 3 to 3.5 hours. The moose will be fall apart tender and the liquid will have thickened into a rich, velvety sauce. 
  • Served the Moose Barrenland over garlic smashed potatoes, with sauteed onions and mushrooms and some seasonal vegetables.
 Enjoy!


Friday, August 19, 2011

Back from Vacation

I've been back from my two-week Newfoundland vacation for a few days now. It's unfortunate that when you're away from work and home for so long, there is always a mountain of work waiting for you with open arms. I'm finally able to see through the load and thus have a few minutes this morning for a quick post, to let you know some of the great meals I ate, only a fraction of which were cooked by me.

Nothing better to wash down fresh pan fried cod than an icy cold Blue Star.
Of course there was exceptional seafood. Starting on our drive through New Brunswick where we ate succulent, fresh whole belly clams, scallops and haddock at The Sea Breeze Restaurant new New River Beach. One of the culinary highlights of the trip was super-fresh, deep fried cod at Doyle Sansome & Sons Lobster Pool in Hillgrade, New World Island (near Twillingate). More on Doyle & Sons in a future post! And of course the pan-fried cod and cod tongues that we cooked just hours after catching it in Trinity Bay was exceptional. There were other homemade cod dishes and more fish and chips too.

Other exciting things I'll be blogging about soon include Brimstone Bread from a Fogo Island bakery, my latest creation "Moose Barren-land" , Granite Planet Pork Chops (Blue Star beer brine and BBQ sauce), BBQ moose ribs, and my new appreciation for Fussell's Cream.

Check back soon as I'll be posting recipes this weekend.


Thursday, July 28, 2011

Summer of Savory


Of all the ingredients associated with Newfoundland cuisine, I do not know if there is one more synonymous than dried savory. While items such fat back, molasses, salt cod, and Purity syrup are very much a part of our culinary history, summer savory, especially that made by Mt. Scio Farms in St. John's is as Newfoundland as it gets. Just as you are are certain to find an empty Maple Leaf vienna sausage can at the outlet of every brook at every pond in Newfoundland, you're even more likely to find a package of dried savory in every kitchen cupboard in the province.

Newfoundlander's love their savory. We really love it in out "dressing" ( aka stuffing) used for stuffing turkeys and chickens for roasting. Unlike some complicated turkey stuffing recipes, Newfoundland savory dressing is quite simple to make really, combining fresh bread crumbs (homemade white bread is best) with minced onion, some melted butter (usually margarine actually) dried savory and possibly a little salt and pepper. Almost as popular as savory in fact is savory dressing you;ll find elsewhere besides in a roasted bird however. A signature Newfoundland dish is the ever-popular fries (or chips), dressing and gravy, which can be found at most any restaurant and take-out, stadium or chip truck. The dish, when prepared right consists of a pile of golden homemade french fries (double-fried), combined with fluffy savory dressing and smothered with a rich home-style chicken gravy (darkened with gravy browning of course. None of this white chicken gravy stuff...that would be gross). French Canadians have their poutine, other places have chili cheese fries, but our carb-laden, heart-attack on a plate is the most satisfying and tastiest in my opinion.

Besides being used in dressing, savory is also commonly used with fish and other meats. It goes great in cod au gratin and with fried or braised pork chops. For me though, the uses and application of savory are unlimited. While I enjoy my supply of dried Newfoundland savory very much, I decided this spring to try growing my own savory. Dried herbs are good and have their place in cooking, but there's really no substitute for the flavor achieved from using fresh herbs. Not being able to find savory seeds at some local stores here in western New England, I opted for the Internet and was quickly able to find organic summer savory seeds online. What is "summer" savory you ask? Well there are two varieties of savory, summer and winter. Winter savory is a perennial herb (meaning it grows back every year in our climate....and year round in warmer
Summer Savory Growing in a Small Herb Planter Box
 regions) while summer savory is an "annual", meaning it has to be replanted by seed every year. Winter savory is a little woodier plant that summer savory and the leaves have a stronger, more robust flavor than its cousin. Summer savory, which is the kind I grew up eating in Newfoundland, has a pungent, sweet and peppery flavor, similar but still  distinct from thyme and sage. Traditionally, summer savory is a popular herb used with wild game and waterfowl, sausages, stews, beans, and potatoes. It's quite common in some regions in eastern Europe, but why it became so popular in Newfoundland is something I still do not know. Whatever the reason, I'm glad it ended up on our shores!

Savory Fries with Grana Padano and Truffle Oil
So, with all the beautiful summer savory I have growing in my garden, I wanted to make a simple bistro style dish using a few simple, but very tasty ingredients. Many people know that once of the best and satisfying concoctions is the pairing of hand cut french fries tossed with fresh rosemary and salt. Some places take this even farther and grate some pungent Parmesan cheese with the mixture for a truly delectable experience. Not to be outdone, I decided to take this to the next level and make my own version. What I did was cook some of wicked simple oven roasted fries. While they were still piping hot I tossed them with sea salt, a tablespoon of fresh minced savory, and a little grated Grana Padano cheese (a hard, aged Italian cheese). After plating the salty, herby fries, I drizzled just a little of my truffle infused olive oil around the plate. The result was literally heaven on a plate as the aroma of the earthy truffles with the herbs as they reacted with the heat of the crispy fries, paired with the sea salt and cheese, was a flavor explosion in my mouth. The freshness of the savory really let the defining characteristics of the herb shine through, an affect that could not be duplicated with dried herbs. The dish did in fact remind me of fries, dressing and gravy, without the bread stuffing or the gravy, and hence without a lot of extra calories and fat. I encourage you to try growing your own savory and when you do, try this upscale spin on a Newfoundland classic.

Tuesday, July 19, 2011

Cibatta Chicken BLTA Sandwich


 One of the things I love most about food and cooking is the ability to make something truly satisfying and delicious out of a few simple ingredients and even simpler techniques. One way for any cook to do this, no matter their level of skill is to put together a really great sandwich. Using great bread, well cooked and seasoned meat, crisp vegetables, flavorful cheese and a variety of condiments will always taste better when you make it yourself as opposed to eating anything from a fast food joint.

I'm a real sucker for bread, and when I see really nice artisan or homemade bread I can not resit buying some and digging in. Last week my bread victim were some nice large Cibatta rolls. Having grilled some bone-in, skin on chicken breasts the night before (marinated in fresh garlic, herbs, lemon and olive oil), I knew I had a winner sandwich in the making. I also have some excellent thick-cut, double smoked bacon on hand, fresh herbs in the garden, sharp Vermont cheddar, a ripe avocado and some other goodies. Here's how I put it together.

Ciabatta Chicken BLTA Sandwiches with Herb Mayo


The first step is to get all of your ingredients out on the counter and organized. In a skillet or in the oven, cook 3 slices of bacon (cut in half for 6 half slices) until crisp. meanwhile, remove the chicken meat from the bone and cut into half inch thick slices against the grain, then half length-ways so you are left with large chunks. Next prepare the herb mayo. For two sandwiches I used 2 heaping tablespoons of Hellman's and mixed in some finely chopped basil, parsley, thyme and oregano, plus a tiny pinch of kosher salt and a few cracks of black pepper. Stir well and add to the chicken, again combine well. That's your simple chicken salad for the sandwich.

Turn on the oven to about 350. Slice the cibatta rolls in half and lay cut side down in the oven to toast. Now start prepping the other ingredients by slicing tomatoes, chopping lettuce, slicing an avocado, and sharp cheddar cheese. Remove the tops of two rolls from the oven and add the cheese and top with the bacon. Return the tops to the oven to melt the cheese.While the cheese melts build the sandwich from the bottom up with avocado slices, lettuce, tomato slices (the LTA of the BLTA.....bacon is the B) and chicken salad. I also like to add banana pepper rings for a touch of heat and acidic contrast from the pickling. Remove the sandwich tops with their gooey bacony cheese topping and place on top of the rest of the sandwich. Slice in half and you're ready to dig in. Serve with some large kosher dill pickles and potato chips and you''' be all set!

Saturday, July 16, 2011

Moose and Partridgeberry Panini

Here at A Wicked Scoff I'm always thinking about how I can take traditional Newfoundland or New England ingredients and use them in a new and unique way. Living here in the Boston States I do not have a full arsenal of Newfoundland fare at my disposal but I do have special products that let me get my creative culinary juices flowing.

Down to my last couple pint sized Mason jars of my Uncle's bottled moose (from central Newfoundland), I decided to try something special. I wanted to build off my last bottled moose creation, the moosewich dip, and go more outside the box. I know that red meat, and especially game go great with tart berries, wine and port so I utilized a couple other Newfoundland ingredients and came up with a tasty moose panini sandwich.I paired the tender morsels of moose with some tart partridgeberry jam (aka lingonberries in other parts of the world, notably in Scandinavia or at IKEA stores) and sharp aged cheddar cheese. I made these grilled sandwiches on some wonderful, locally made rustic sourdough bread, for even extra tang and a great chew. Any kind of good quality bread would be great though. Not wanting to throw away and waste all the moose bottling liquid (referred to as moose liquor from this point forward), I paired it with some Newman's Port. I drizzled the port moose liquor reduction around the plated panini and dipped some of the bites into it for an extra fruity, salty burst of flavor. Here are some pictures and how I put it all together.

Moose and Partridgeberry Panini with Port Reduction (2 large sandwiches)


Ingredients:

  • 1 pint of bottled moose (can use slow cooked braised game or red meat)
  • 4 large slices of quality bread such as sourdough, 
  • sharp cheddar cheese, sliced (brie cheese would also be nice I imagine)
  • 2 Tbsp partridgeberry jam/preserves (or lingdonberry, may substitute with red current jelly, etc)
  • 1/4 cup of port
  • non stick cooking spray
Directions:

First off, I you do not have a panini press, don't sweat it. These sandwiches can be made in a skillet just as you would a grilled cheese or even on a cast iron griddle. If you want the panini effect of the sandwich getting pressed add a heavy pan to the top of the sandwich to press it a bit.

To start, place the contents of your bottled moose in a small skillet (I use a skillet as opposed to a sauce pan as this will help with the reduction later). Heat the moose and liquor through over a medium heat. I like to have the moose warm on the sandwich instead of putting it on there cold. Next, plug in your panini press and let it get hot. Lay out your four slices of bread and begin to assemble the sandwiches. Spread 1 Tbsp of the jam on two slices and cover the other two slices with thinly sliced sharp cheddar cheese.Next divide the tender moose meat atop the slices with the cheese. There should be enough moose to sneak a couple pieces into your mouth as a little snack. Lay the jammed slice of bread onto the moose/cheese slice and you're all set. Open your panini press and spray both sides with nonstick spray or oil. Lay on the sandwiches and press down. Cook according to your machines directions or until browned, crispy and heated through.

I let the paninis rest for a couple of minutes (they're too hot too eat) while I make the reduction. Bring the reserved moose liquor to a boil and add a 1/4 cup of port. Stir together and let reduce until it becomes syrupy and coats a spoon. Use this reduction to drizzle around your plated panini for dipping. This sandwich was a huge hit at home the other night and I'm sure it will be for you and your friends and family too. Paired with a nice glass of Rodrigues wine or cold glass of beer and you'll have a great combination. So here you have it, two of Newfoundland's best ingredients, moose and partridgeberries together again, just as they are in nature out on the barrens.

Tuesday, July 12, 2011

Wicked Summer Eats....in Newfoundland

For all you A Wicked Scoff readers and Facebook Fans, be sure to pick up the July issue of Downhome Magazine to read my article on wicked summer eats in Newfoundland. If you live in Newfoundland, will find yourself vacationing there this summer, or have an intrinsic interest in "The Rock", I think you'll enjoy my top 10 list of places I plan on eating at this summer. While my list is capped, there are many more establishments around the Island that I hope to check out. Be sure to send me your selections of restaurants, take-outs and the like that I just have to go check out. Whether its your favorite fish and chips spot, best home-style cooking restaurant that will make me think I'm back in Nan's kitchen or the best ice cream stand, I want to know about it. Drop me a line here on the blog, on A Wicked Scoff's Facebook Fan Page or by email at awickedscoff@gmail.com.

I look forward to hearing from you. In the meantime, here are a couple of my "wicked summer eats" picks. For the rest make sure to pick up your copy of Downhome Magazine. And remember, if you haven't hit like on the Facebook page, and you do like A Wicked Scoff, be sure ti visit. Right now we're at 282 fans, lets see if we can hit 300 this week!

Sample of Wicked Summer Eats (Downhome Magazine July 2011)

The Rooms Café – I’ll likely drive back into St. John’s the day before I fly out so I can spend more time with old friends. Resuming a tradition I started on my last trip home, I’ll fuel my appetite with a brisk early morning hike out through the battery and up and down Signal Hill. That hike has to be one of the best gems of any city in North America and I am going to take full advantage. From there I’m driving straight to The Rooms, where from the café there you’ll be treated with a view out the narrows and down over the jelly bean coloured houses and other unique architecture that give St. John’s its character. While I know the view from The Rooms is spectacular, I’ve never eaten at the café, but from the look of their menu I might be hard pressed to go just once. I’m thinking a hearty traditional Newfoundland breakfast of toutons, baked beans, and local apple sausages with some Jumping Bean coffee will be just what the doctor order for this soul. I’m pretty sure if I was still living in the “sin city” that The Rooms Café would be a weekly ritual.

The Duke of Duckworth – After a scoff like that for breakfast I’ll probably skip lunch. Hopefully it will be a nice clear day and I can continue taking in the view around the city by heading up to Pippy Park with some buddies for a round of golf. Walking that hilly course on a hot August afternoon will surely work up my thirst and appetite and by the end of it my mouth will be watering for a cold pint of local brew and some of the best fish and chips (fee and chee as the townies call it) the city has to offer. The best place for that combo in my opinion is The Duke of Duckworth, an English style pub with excellent atmosphere and a large selection of beer on tap. “The Duke” as it is affectionately known, is a landmark in the City of Legends and is likely even more popular since I have been there as it is featured on the hit CBC show The Republic of Doyle. While there are no shortage of good fish and chips places in Newfoundland, The Duke makes as good a feed of fee and chee as I’ve ever had. The fries are hand cut and the fish is fresh, flaky with a thin, crispy and bubbly batter. I’m salivating right now just thinking about it. In order to work this meal off and to prevent getting loggy, I dare say I’ll end up walking down to Shamrock City to listen to some much missed live Newfoundland-Irish music and possibly do a jig or two. It’s going to be a real scoff and a scuff kind of night.

Friday, July 8, 2011

Spaghetti and Meatballs

Spaghetti and meatballs might not be very "east coast" but find me a household that doesn't love this Italian favorite and I'll eat my lobster trap. This recipe is very Italian as it uses sweet San Marzano tomatoes, lots of fresh Italian herbs and a combination of ground beef, veal and pork for the meatballs. Throw in some Parmesan and mozzarella cheese and you'll think you you've been transported to Napoli!

Neapolitan Marinara Sauce

The best Italian dishes are the simple ones, highlighting the flavors of good quality ingredients. This marinara sauce is so easy, you'll never pick up a bottle of the store-bought stuff again. The keys to this sauce are  the San Marzano tomatoes (which grow in the rich volcanic soils around Mt. Vesuvius in Italy), the fresh basil and the long, slow cooking. While San Marzano tomatoes are pricier than your average canned tomatoes, the quality and taste are unprecedented. You're still making a big pot of sauce for just over $6 so don't be cheap over the tomatoes.

Ingredients:

  • 2, 28 ounce cans of San Marzano tomatoes, squeezed in your fingers
  • 1 small onion, minced
  • 2-3 cloves garlic, minced
  • 2 Tbsp olive oil
  • pinch of dried hot chili flakes
  • salt and pepper
  • fresh basil leaves, chopped
Directions:


In a large sauce pan, or better yet a Dutch oven, heat the olive oil over medium heat and add the onions. Cook until they become soft and translucent, 2-3 minutes and add the garlic and chili flakes, and season with a little salt and pepper. Next add the tomatoes one at a time, squeezing them between your fingers as you drop them in the pot. This is very Italian! Once all the tomatoes are in there, add about half of your herbs and bring to a low simmer. Cover and cook at a low simmer for about an hour. Before serving add the remaining fresh herbs and taste for salt and pepper.

To make the absolute best spaghetti, and avoid getting a watery pool at the bottom of your plate, boil your pasta according to the package but remove when it is just under cooked slightly. Add enough sauce for the spaghetti (this works well in small portions) to a skillet and combine with the spaghetti and a little of the starchy pasta water (again, very Italian). Cook the spaghetti in the sauce until it it clings to the pasta and the spaghetti is al dente. Using tongs, plate the spaghetti and sauce on your plate and surround with meatballs. Top with more fresh herbs and grated cheese.

Moma mia!  bon apetito

Mozzarella Stuffed Meatballs

Ingredients

  • 3 pounds of meatloaf mix (or 1 pound each of ground beef, veal and pork)
  • 2 eggs
  • 1/2 cup milk
  • 1/2 cup breadcrumbs
  • 1/4 cup grated Parmesan or Romano cheese
  • 1/2 medium onion, minced
  • 2-3 cloves garlic, minced
  • 2 Tbsp each of fresh parsley, basil and oregano chopped
  • 1/2 tsp hot chili flakes
  • 1 tsp each of salt and pepper
  • fresh mozzarella cheese, cut into small cubes

Directions:

Add all the ingredients except for the mozzarella into a large bowl. Take off your rings and watch, wash your hands and get in there, mixing everything together well. Pinch off pieces of the mixture that area bit bigger than a golf ball (but smaller than a tennis ball). Working quickly, slightly flatten the ball into a patty and place a cube of mozzarella in the center. Next form the meat mixture around the cheese cube and form a rough ball. Pat it around between your palms so you have a perfectly round meatball. Lay down and keep the process going. While you can bake the meatballs off, I prefer to give them a sear on all side in a hot skillet with a little olive oil.You don't have to cook them all the way through as I like to finish the cooking by dropping the meatballs into the marinara sauce to finish. You can also finish them in a hot oven.

Thursday, June 30, 2011

Baby Back Ribs and BBQ Dry Rub

Smoked Baby Back Ribs

Real barbeque by definition involves slow cooking meat over a wood fire, infusing smoke and flavor while the meat becomes tender and succulent. What most of us do in our backyards is actually grilling, not barbeque...but that's okay. If you don't want to invest in a competition BBQ smoker or fuss with wood fires, there is a way to cook barbeque on your gas grill using a small metal smoker box and store bought wood chips. The process is still low and slow cooking, and by placing the smoker box over the gas flame and the meat indirectly (not over a flame) you can achieve BBQ that is pretty close to the real deal.

If you're planning on having the ribs for a later afternoon or evening dinner, start your prep work early in the morning or night before (if you have the time). Baby back ribs are more tender and less fatty than side or spare ribs. One thing that may make them less tender is a membrane on the bone side of the ribs called silver skin. If your butcher has not removed this, do so using a paring knife and your fingers. Once the ribs are free of the silver skin, season liberally on both sides with the dry rub see recipe below). Stack your rubs and wrap in plastic, and store in the fridge to marinate for a few hours.

All Purpose BBQ Dry Rub
  • 1/2 cup kosher salt
  • 1/2 cup dark brown sugar
  • 2 Tbsp paprika
  • 1 Tbsp chili powder
  • 1 Tbsp onion powder
  • 1 Tbsp garlic powder
  • 1 Tbsp allspice
  • 1 Tbsp ground black pepper
  • 1 tsp cayenne pepper
  • 1 tsp dry mustard
  • 1 tsp smoked paprika
Combine all ingredients, mix well and store in an airtight container. Apply to all your favorite BBQ and grilled food such as ribs, pork chops, chicken, burgers and hot dogs, and add to homemade BBQ sauce.

For cooking the ribs, allow about 4 1/2 to 5 hours for the cooking process. You'll want to slow cook the ribs for about 4 hours on low heat (225-250 degrees) and then cook them over a flame while basting in BBQ sauce for the final 10-15 minutes.

 To cook the ribs, light your gas grill and set the front burner to high and leave the rear burner off. Fill your metal smoker box with store-bought wood chips (many supermarkets carry these now in maple, hickory, mesquite and apple wood) and place it over the front burner. I find that there is no need to soak the chips for this technique. Once the grill comes up to about 225 to 250 degrees place your rib racks along the back part of the grill, including the small narrow upper gates if your grill has those.Stay by for the first little while as you calibrate your front burner setting in order to achieve an internal grill temperature of 225 to 250. If your grill thermometer does not work I'd encourage you buy an accessory one. When I made these ribs last week I achieved an even temperature of 230 and let the ribs go for four hours. Half way through I turned all the racks of ribs and dumped out some f the black wood chips and added some new ones. Warning, the smell of real bbq and wood smoke may draw in your neighbours so make sure to cook extra.

After the ribs have cooked for four plus hours they should be quite tender and able to be pulled away from the bone. You can eat them as they are (dry) and they will be delectable or you can turn on both flames and cook them further by basting them in homemade BBQ sauce (wet). I like both styles and often put a rack of dry aside. I usually coat one side of the ribs with sauce, turn and coat the other side, letting each side cook face down for about 2-3 minutes. I then repeat the process. Be carefull during this step as the sugar in the sauce can burn easily.

Serve up with some coleslaw, baked beans and other BBQ favorites like baked potato and you'll behaving some of the best BBQ you've ever made. There might be a bit of work involved but once you taste this it will be well worth it. Look out for the smoke ring in the meat once you bite in.

Monday, June 27, 2011

BBQ Chicken and Ribs with Beer BBQ Sauce

A Wicked Summer BBQ with Smoked  Babyback Ribs, Wings & Sauce
For most of you in A Wicked Scoff's reading audience, summer is upon us. To my friends, relatives and fellow Newfoundlander's at home, please accept my apologies as I know you are having a dreadful start to the summer season. Of all the things I miss about Newfoundland, June's capelin weather, which consists of day after day of rain, drizzle, fog and temperature hovering around the 10 degree mark (Celsius), is certainly not one of them. According to the forecast however, things are looking up. With warm sunny days come eating and cooking outside and firing up the grill. When it comes time to serving up your favorite grilled meats, whether it be chicken or pork, don;t reach for some store bought BBQ sauce. Instead whip up a batch of homemade sauce, featuring a healthy portion of your favorite beer. Keeping in line with my Newfoundland heritage this recipe calls for an ample amount of fancy molasses, and some of our own Jockey Club beer. You can use whatever beer you like however.

Last weekend was Father's Day and I used my BBQ Sauce on some grilled chicken wings and smoked baby back ribs. Here are a few pictures from the feast along with a recipe for my sauce, which gets basted on the meats for the final 5-6 minutes of cooking. I also like to serve it table side for dipping. I'll let you know how I prepared my ribs, along with a special BBQ dry rub later this week.

Jockey Club BBQ Sauce

Ingredients:
Babyback ribs about to receive a smothering of BBQ sauce
  • 1 small onion, minced
  • 2 Tbsp Canola Oil
  • 2 cups ketchup
  • 1 cup apple cider vinegar
  • 1 cup fancy molasses
  • 1 cup of Jockey Club (or your favorite beer)
  • 1/2 tsp of each of the following: garlic powder, paprika, chili powder, salt and pepper
  • 1 tsp allspice
Directions:


Sauced ribs, getting sticky in the final couple of minutes
In a medium sauce pan, saute the onions in the oil over a medium heat until tender and translucent, but not browned. Add all the remaining ingredients, stir well and bring to a simmer. Reduce heat to low and continue to simmer for about 30 minutes until sauce thickens a little. Apply to your favorite grilled meats for the final few minutes of cooking for a sweet, tangy and sticky BBQ sauce coating. I like to keep the sauce pan next to the grill and keep the sauce warm. Serve on the side as well for extra dipping. Goes great with pork chops, ribs and chicken!
Blog Widget by LinkWithin